
DIY: Patchwork kids shorts
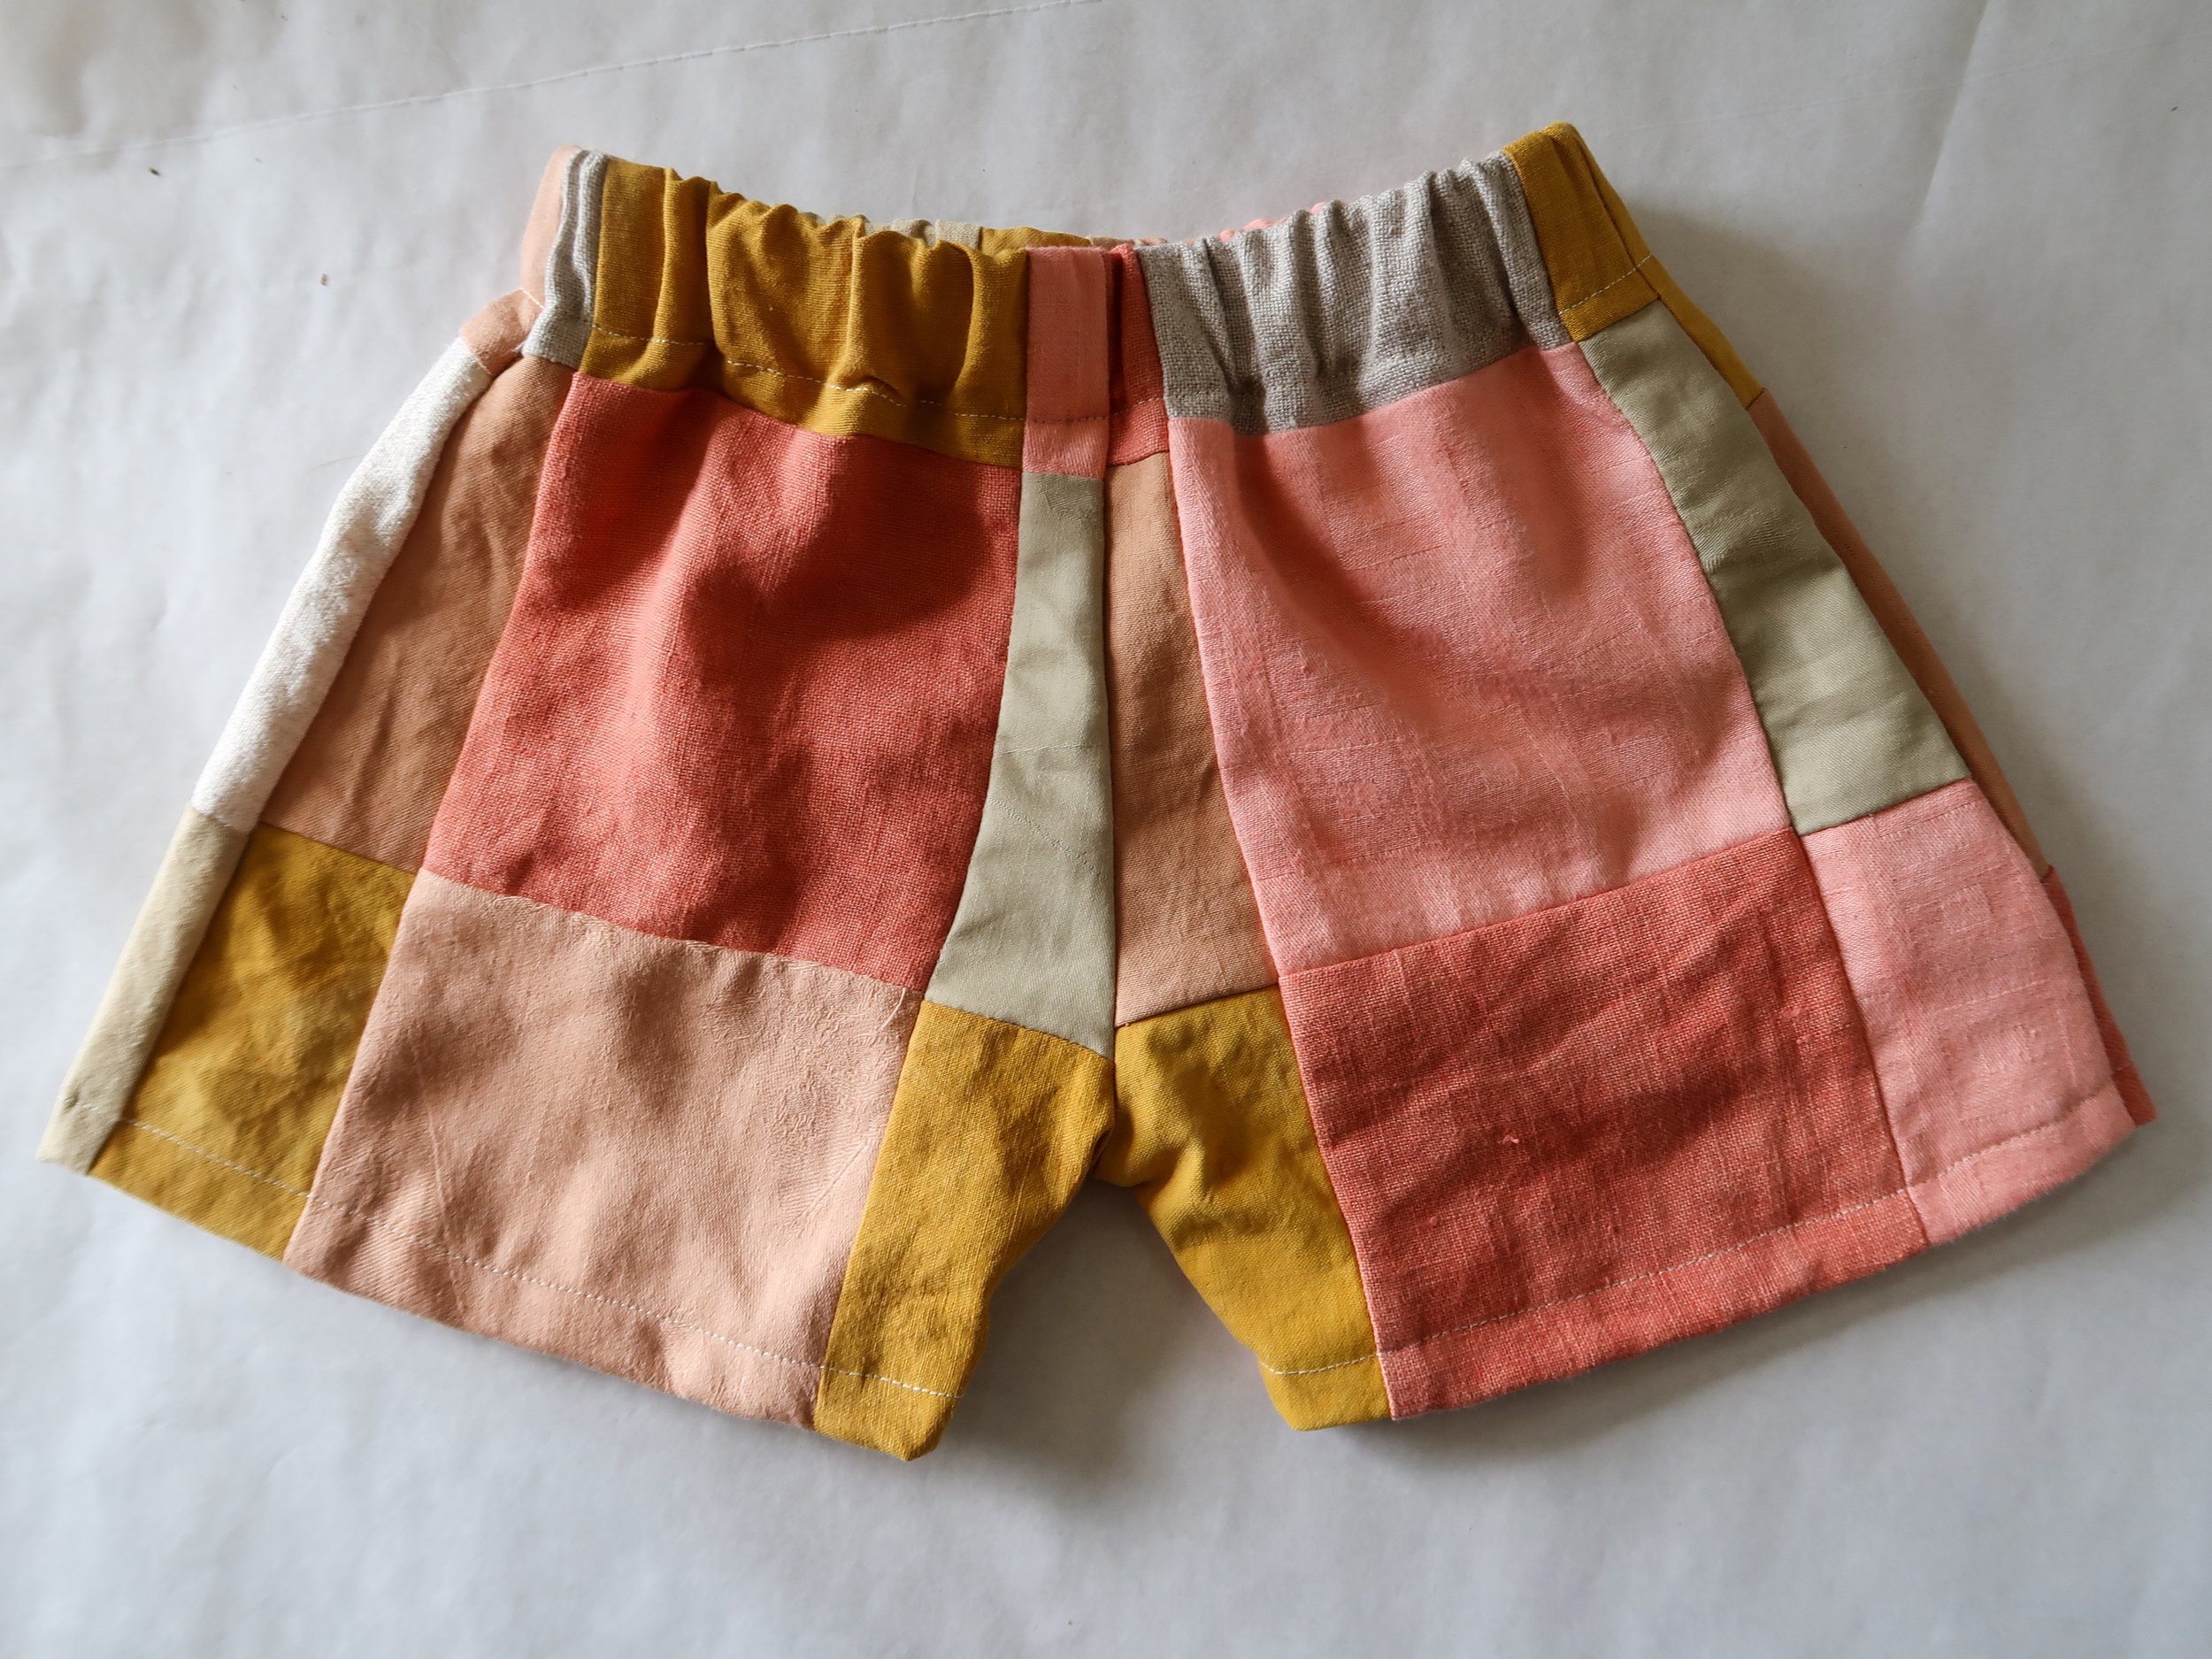
Patchwork shorts are a great way to use up scrap fabric and turn it into a fun, colorful piece of clothing for your kid. I self drafted this pattern to get the right size, copying a pair of shorts.
What you’ll need:
fabric off cuts
Matching thread & bobbin
Fabric Scissors
General pins
Measuring tape
Safety pin
Wide elastic (2.5cm)
Sewing Machine

Step 1
Cut out 18-21 fabric squares each 13x13cm big.
Sew together 3 at a time, overlocking the seams. Then attach each row of 3 to the other, overlocking the side seams, so you end up with a 3x7 layout.
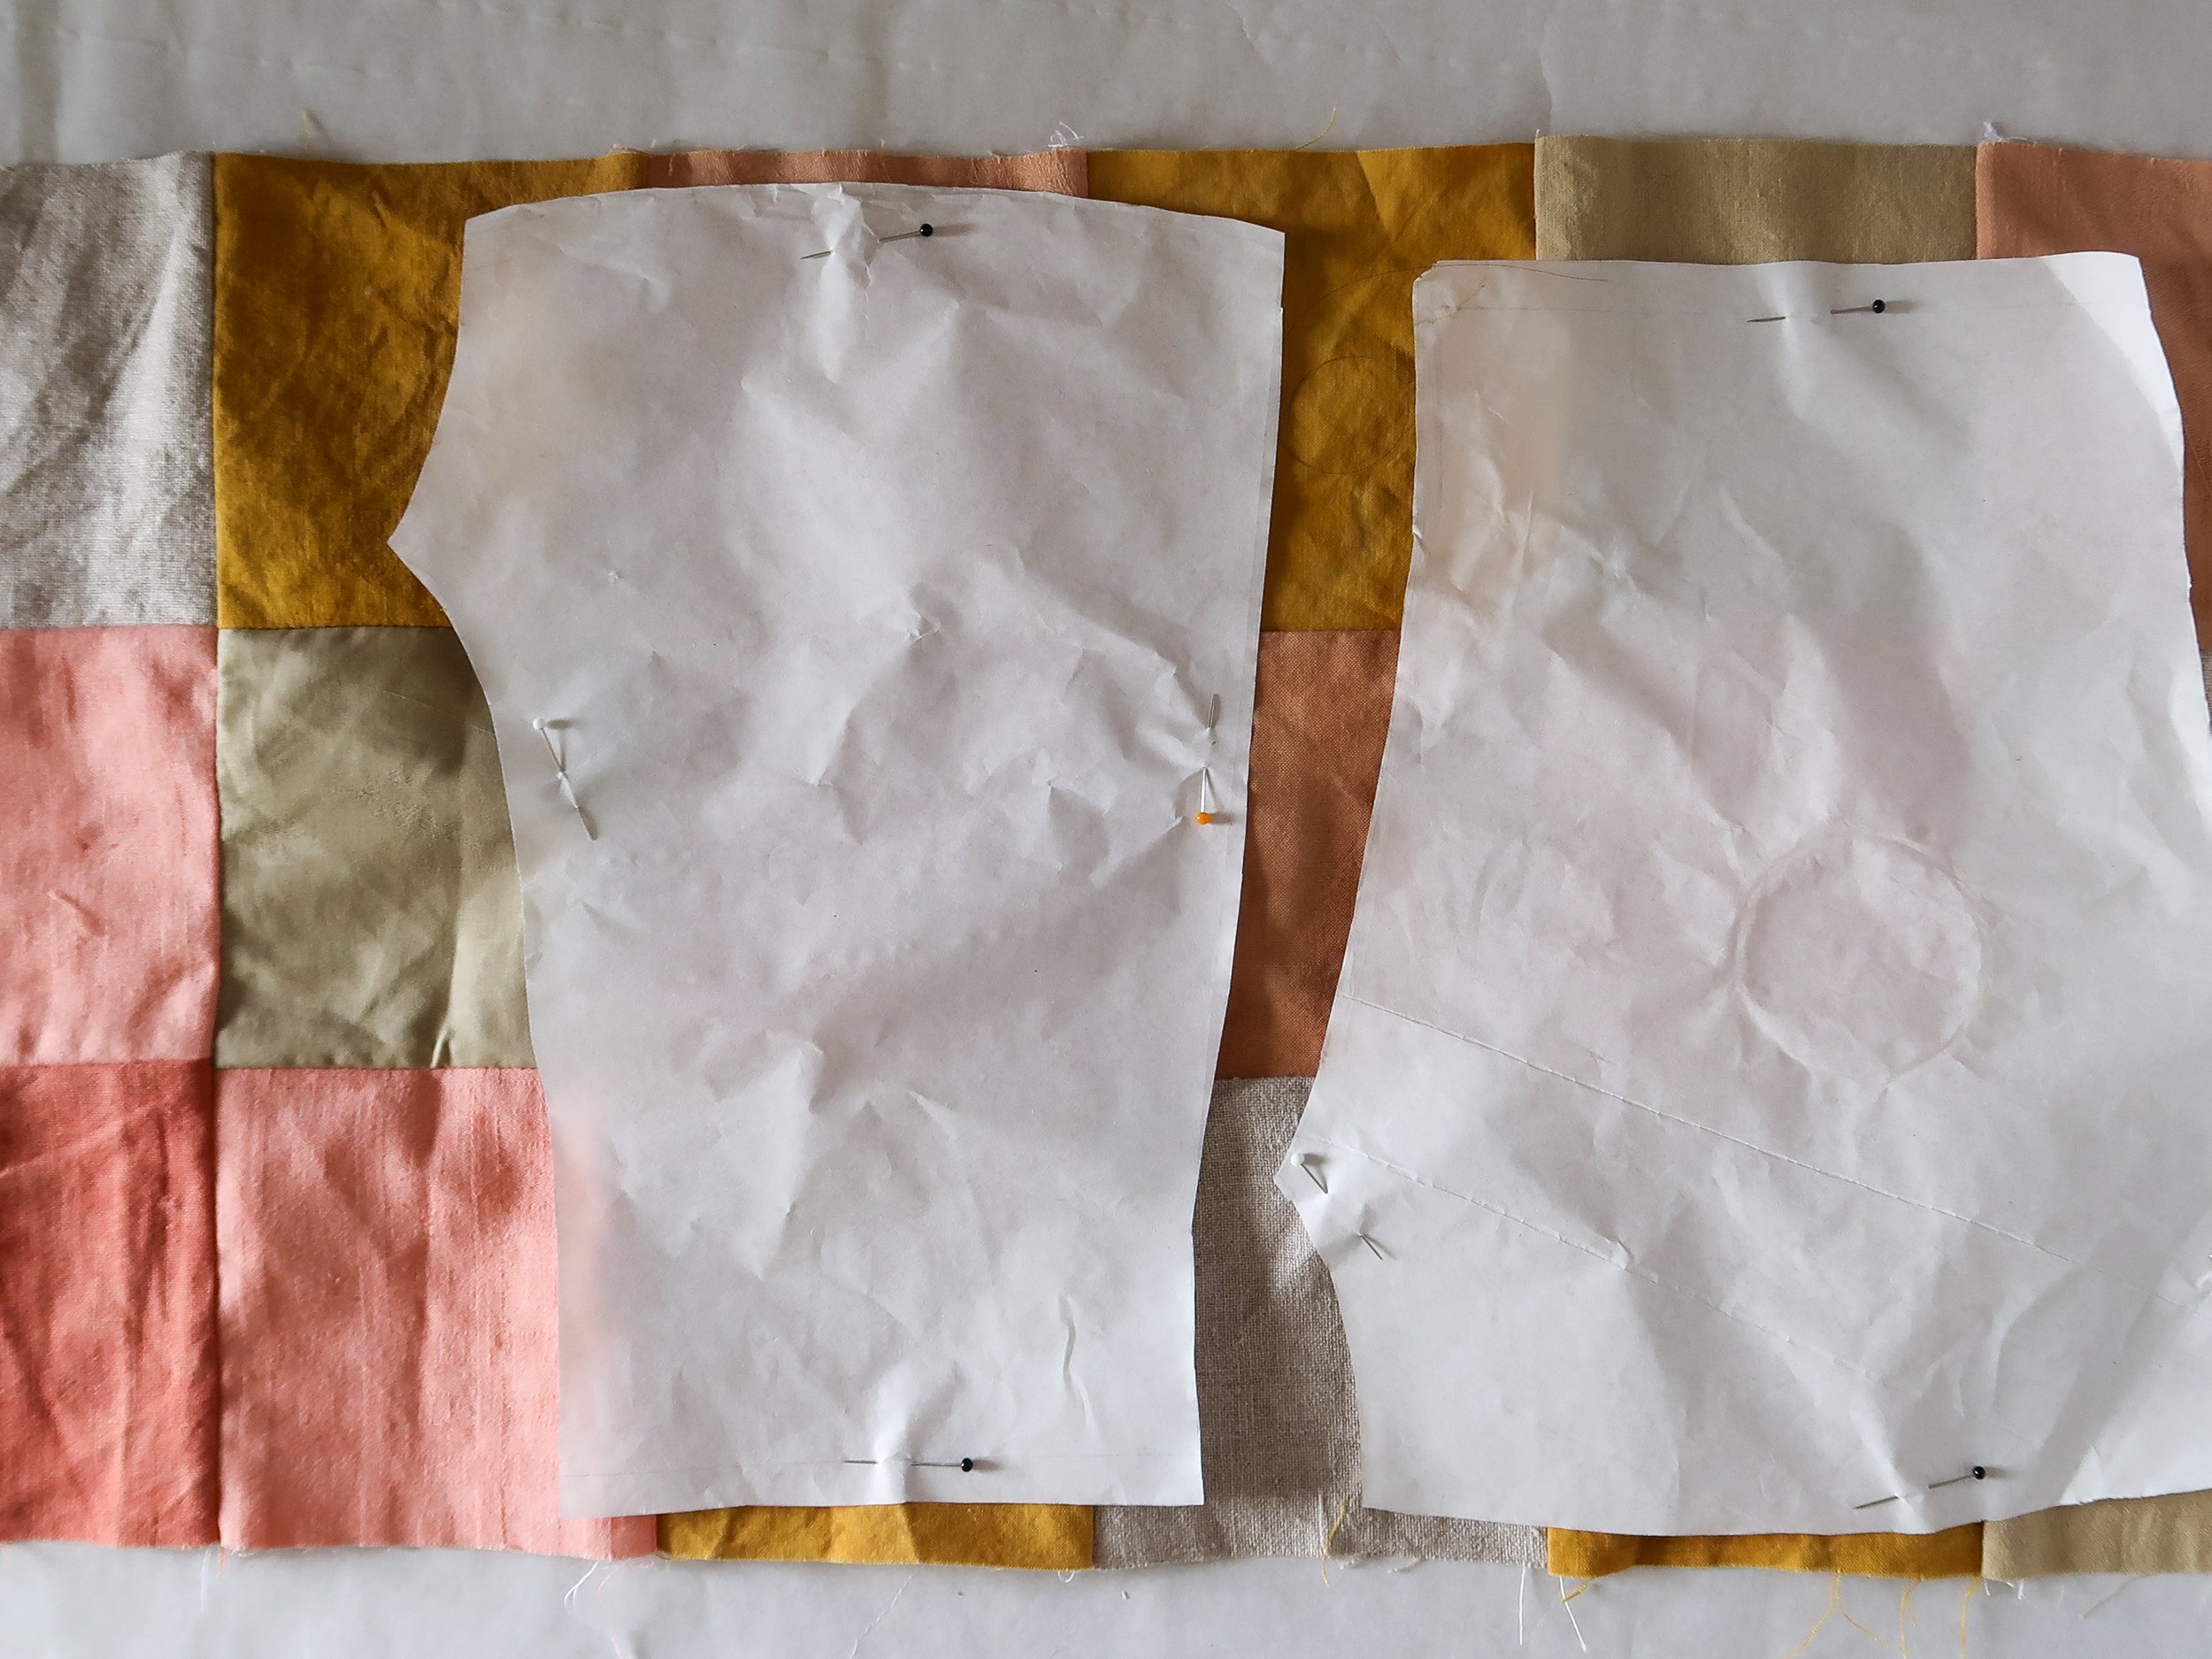
Step 2
Cut out your pattern. I self drafted these from a pair of shorts that fit my child at the moment. Pin down and cut.
Make sure so align the pattern to the fabric squares to have an even layout.

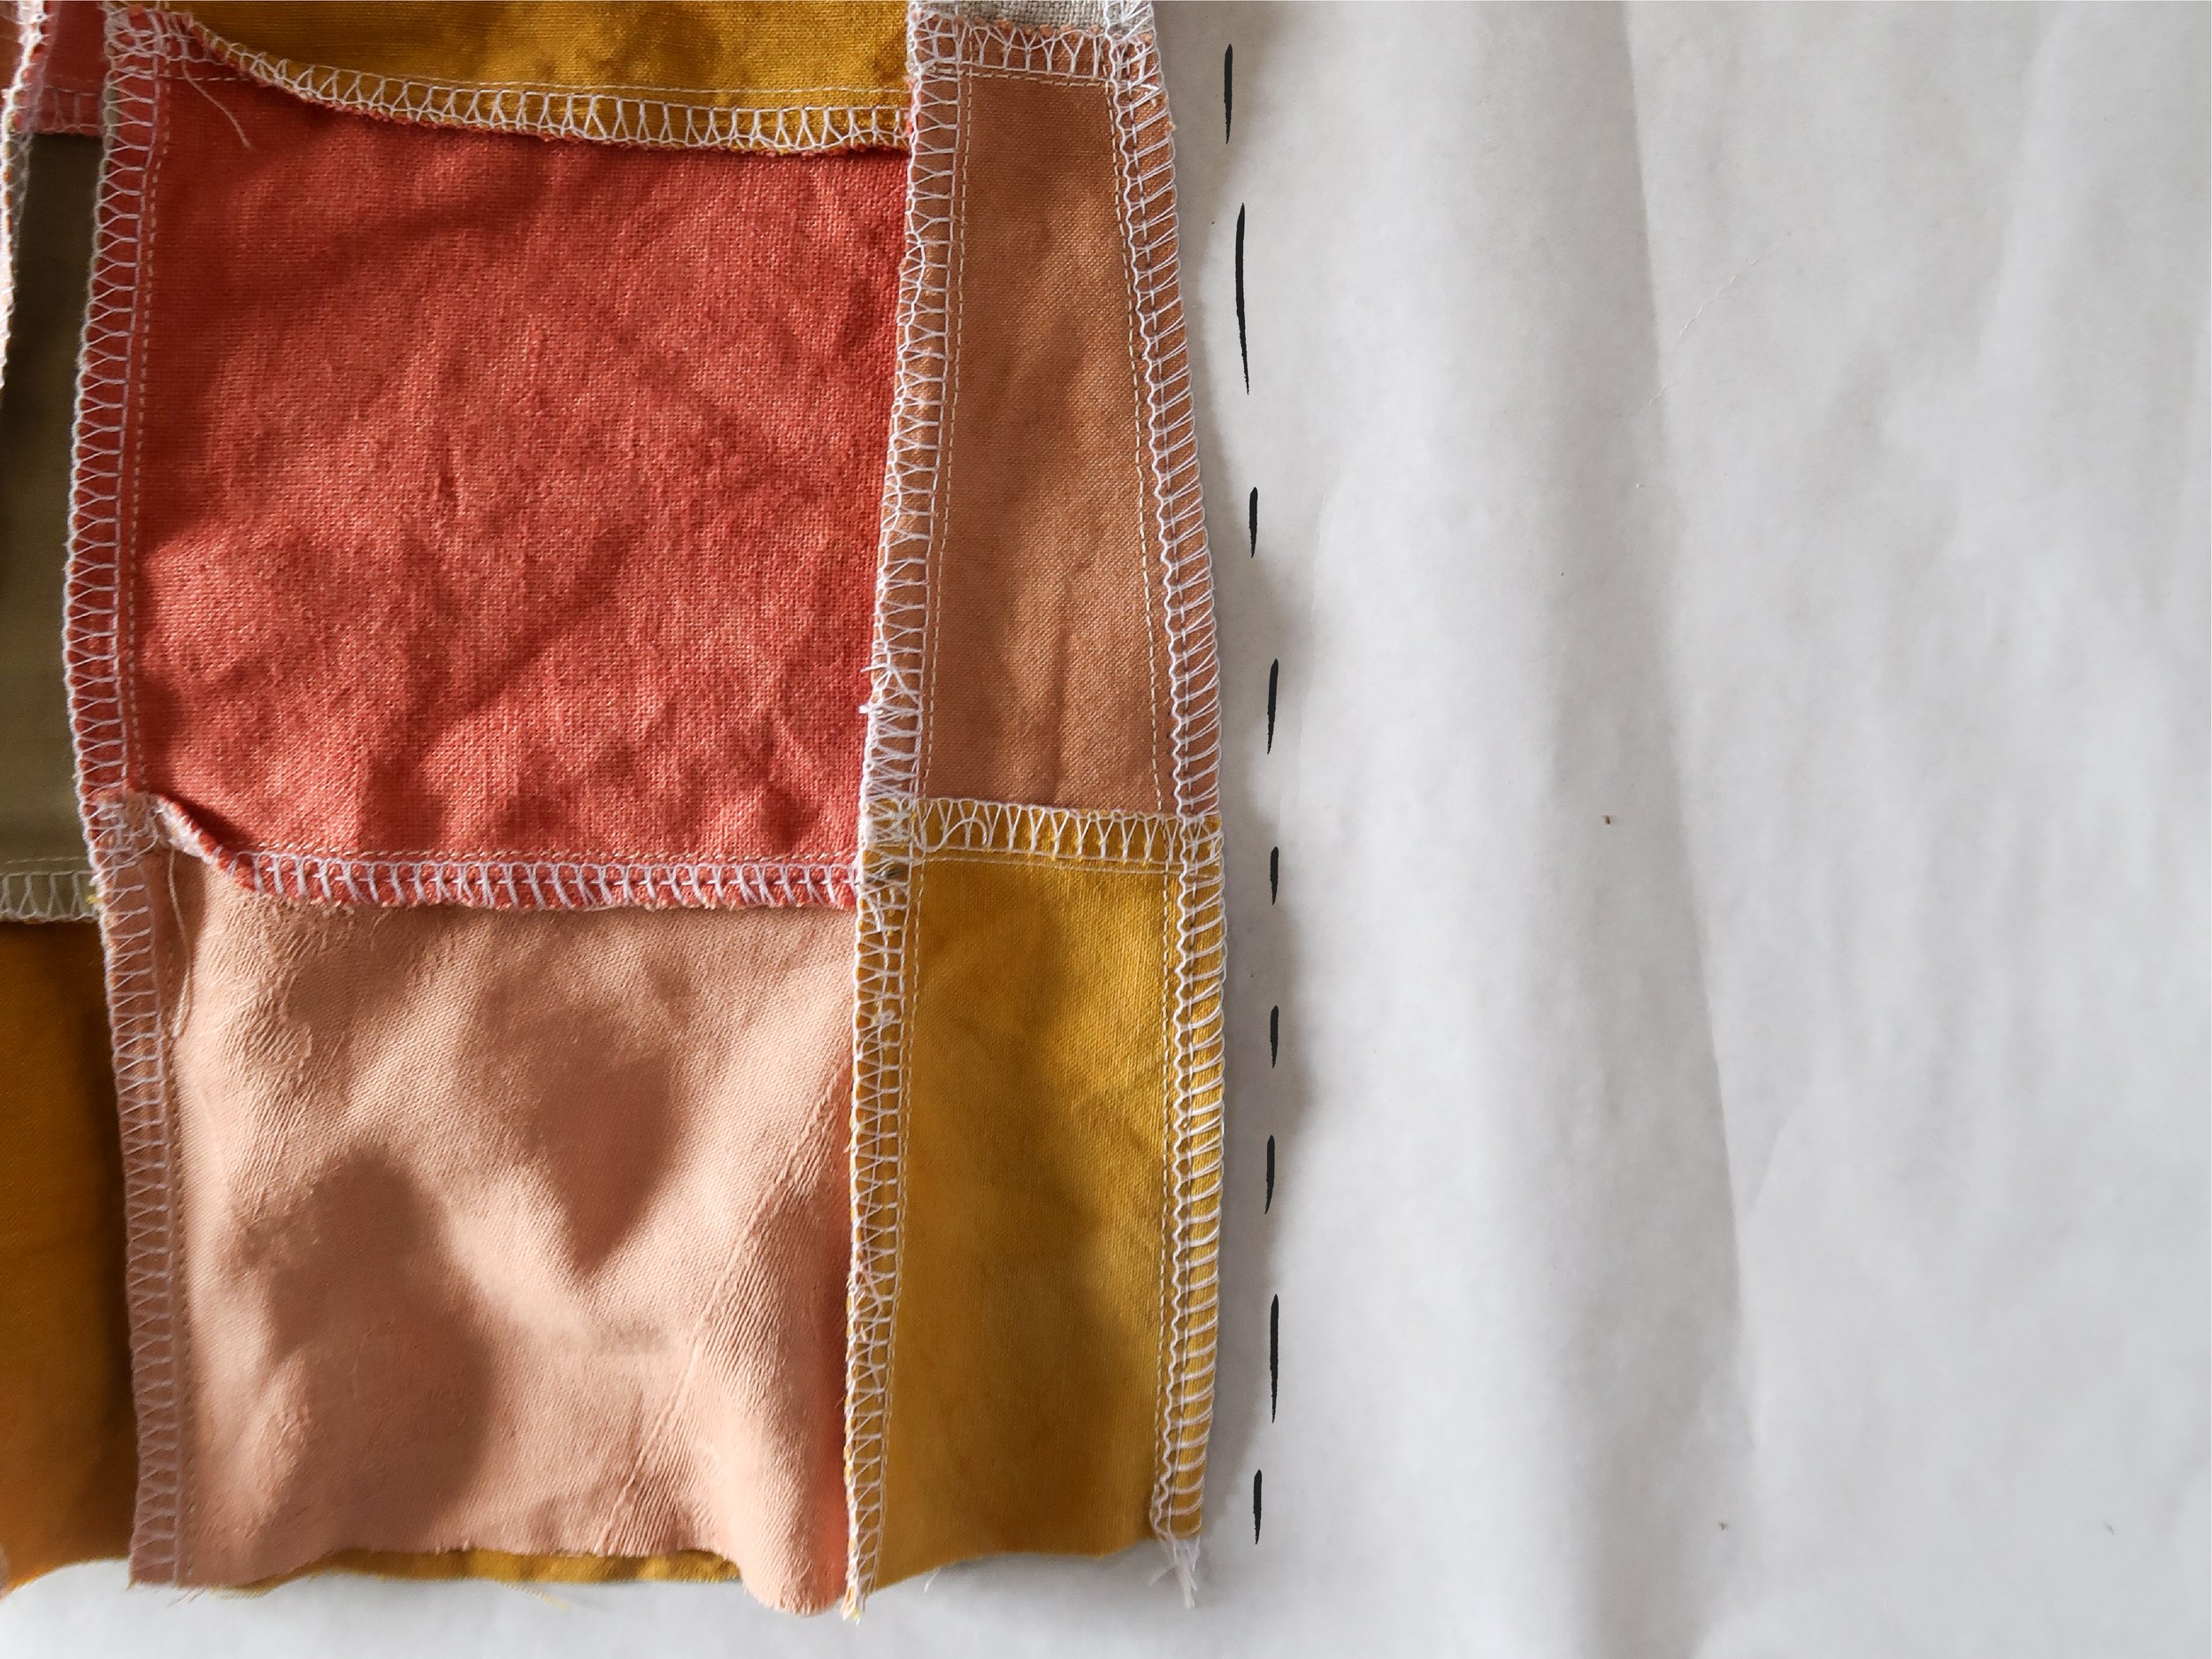
Step 3
Place the front and back sides right sides facing and sew together the front and back seams.
Step 4
Sew the side seams.
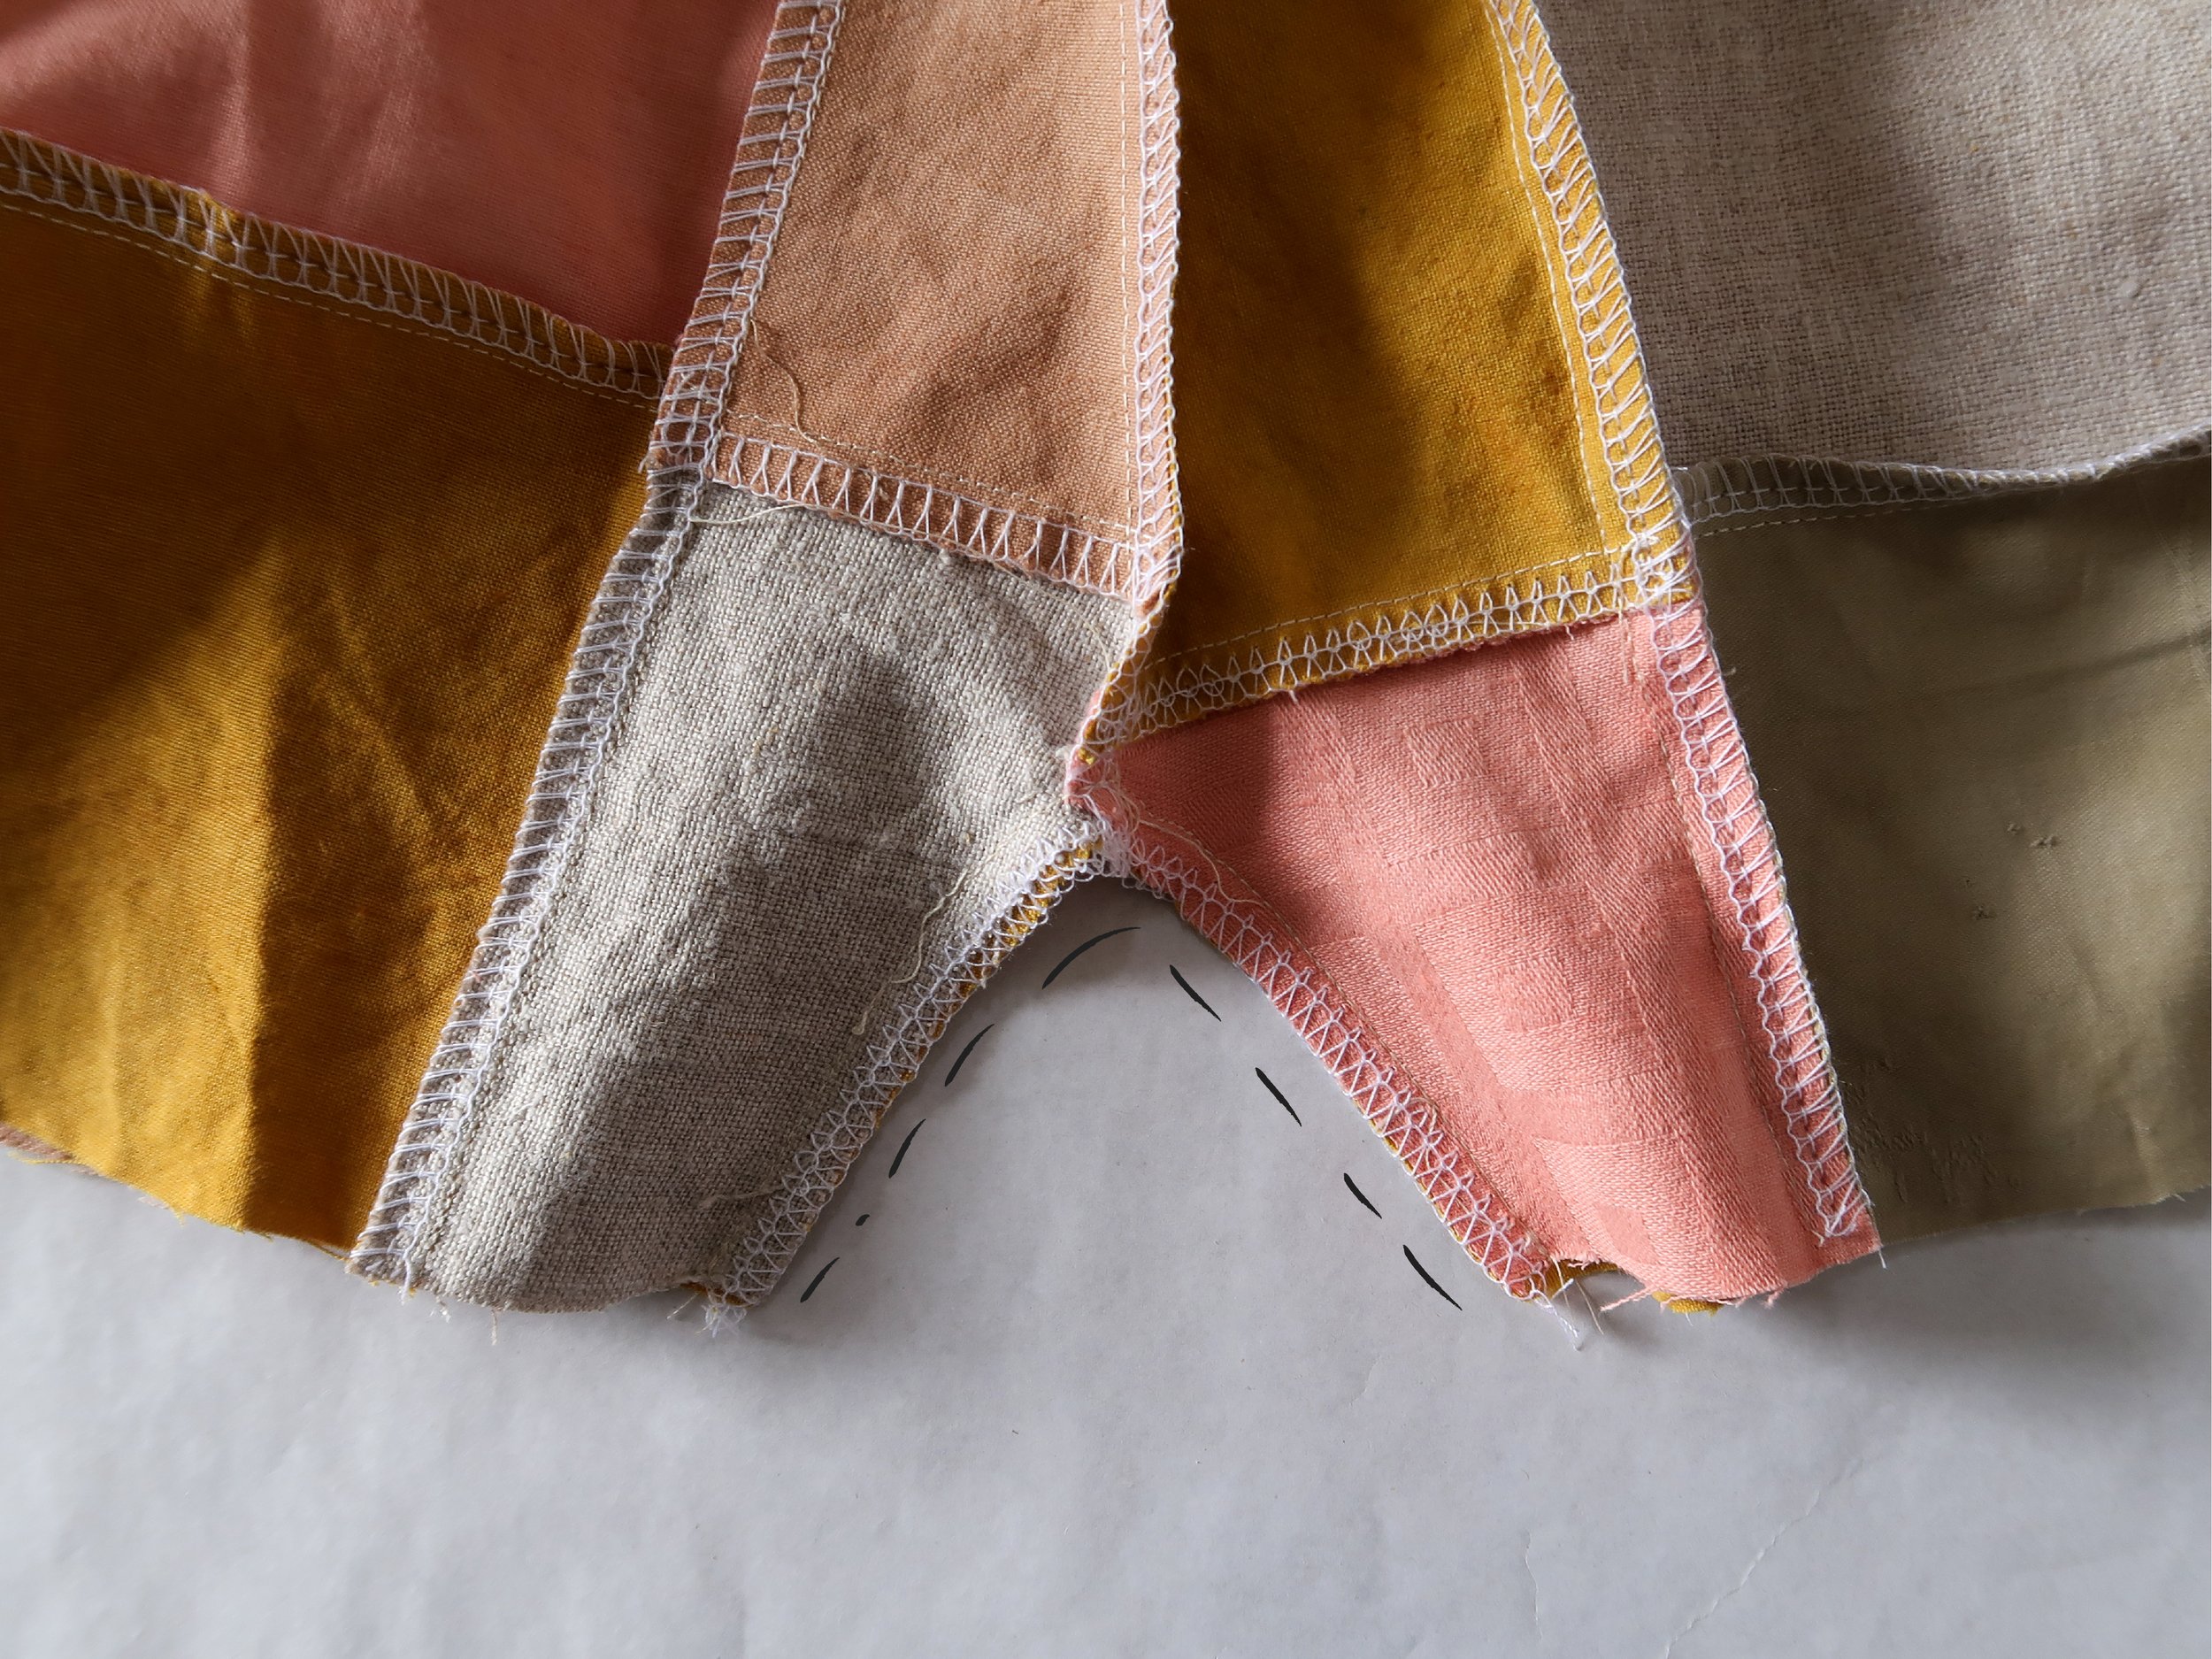
Step 5
Sew the crotch seam.

Step 6
Hem the bottom seam. I was a bit lazy here and simply overlocked the raw edge to finish with a single fold hem.

Step 7
Sew the waist line by double folding the raw edge to make a tunnel for the elastic. Sew all the way around the waist, leaving a 3cm wide opening to insert the elastic.

Step 8
Insert the elastic and secure it with a zic zac stich. Finally sew the gap closed and turn your finished shorts right side out.
And you’re kids’ new favorite shorts are done!
