
Introduction to bundle dyeing

In my opinion, bundle dyeing is the best way to get started with natural dyes. It’s simple, easy and fun and the results are ALWAYS beautiful. Bundle dyeing is also the technique I teach at all my festival workshops, as it’s the fastest way to upcycle old, stained clothes. This tutorial is for you to follow along if you purchased one of my bundle dye kits (thank you! <3), but there's no need to make a purchase to join in the fun. Feel free to work with whatever you have on hand!
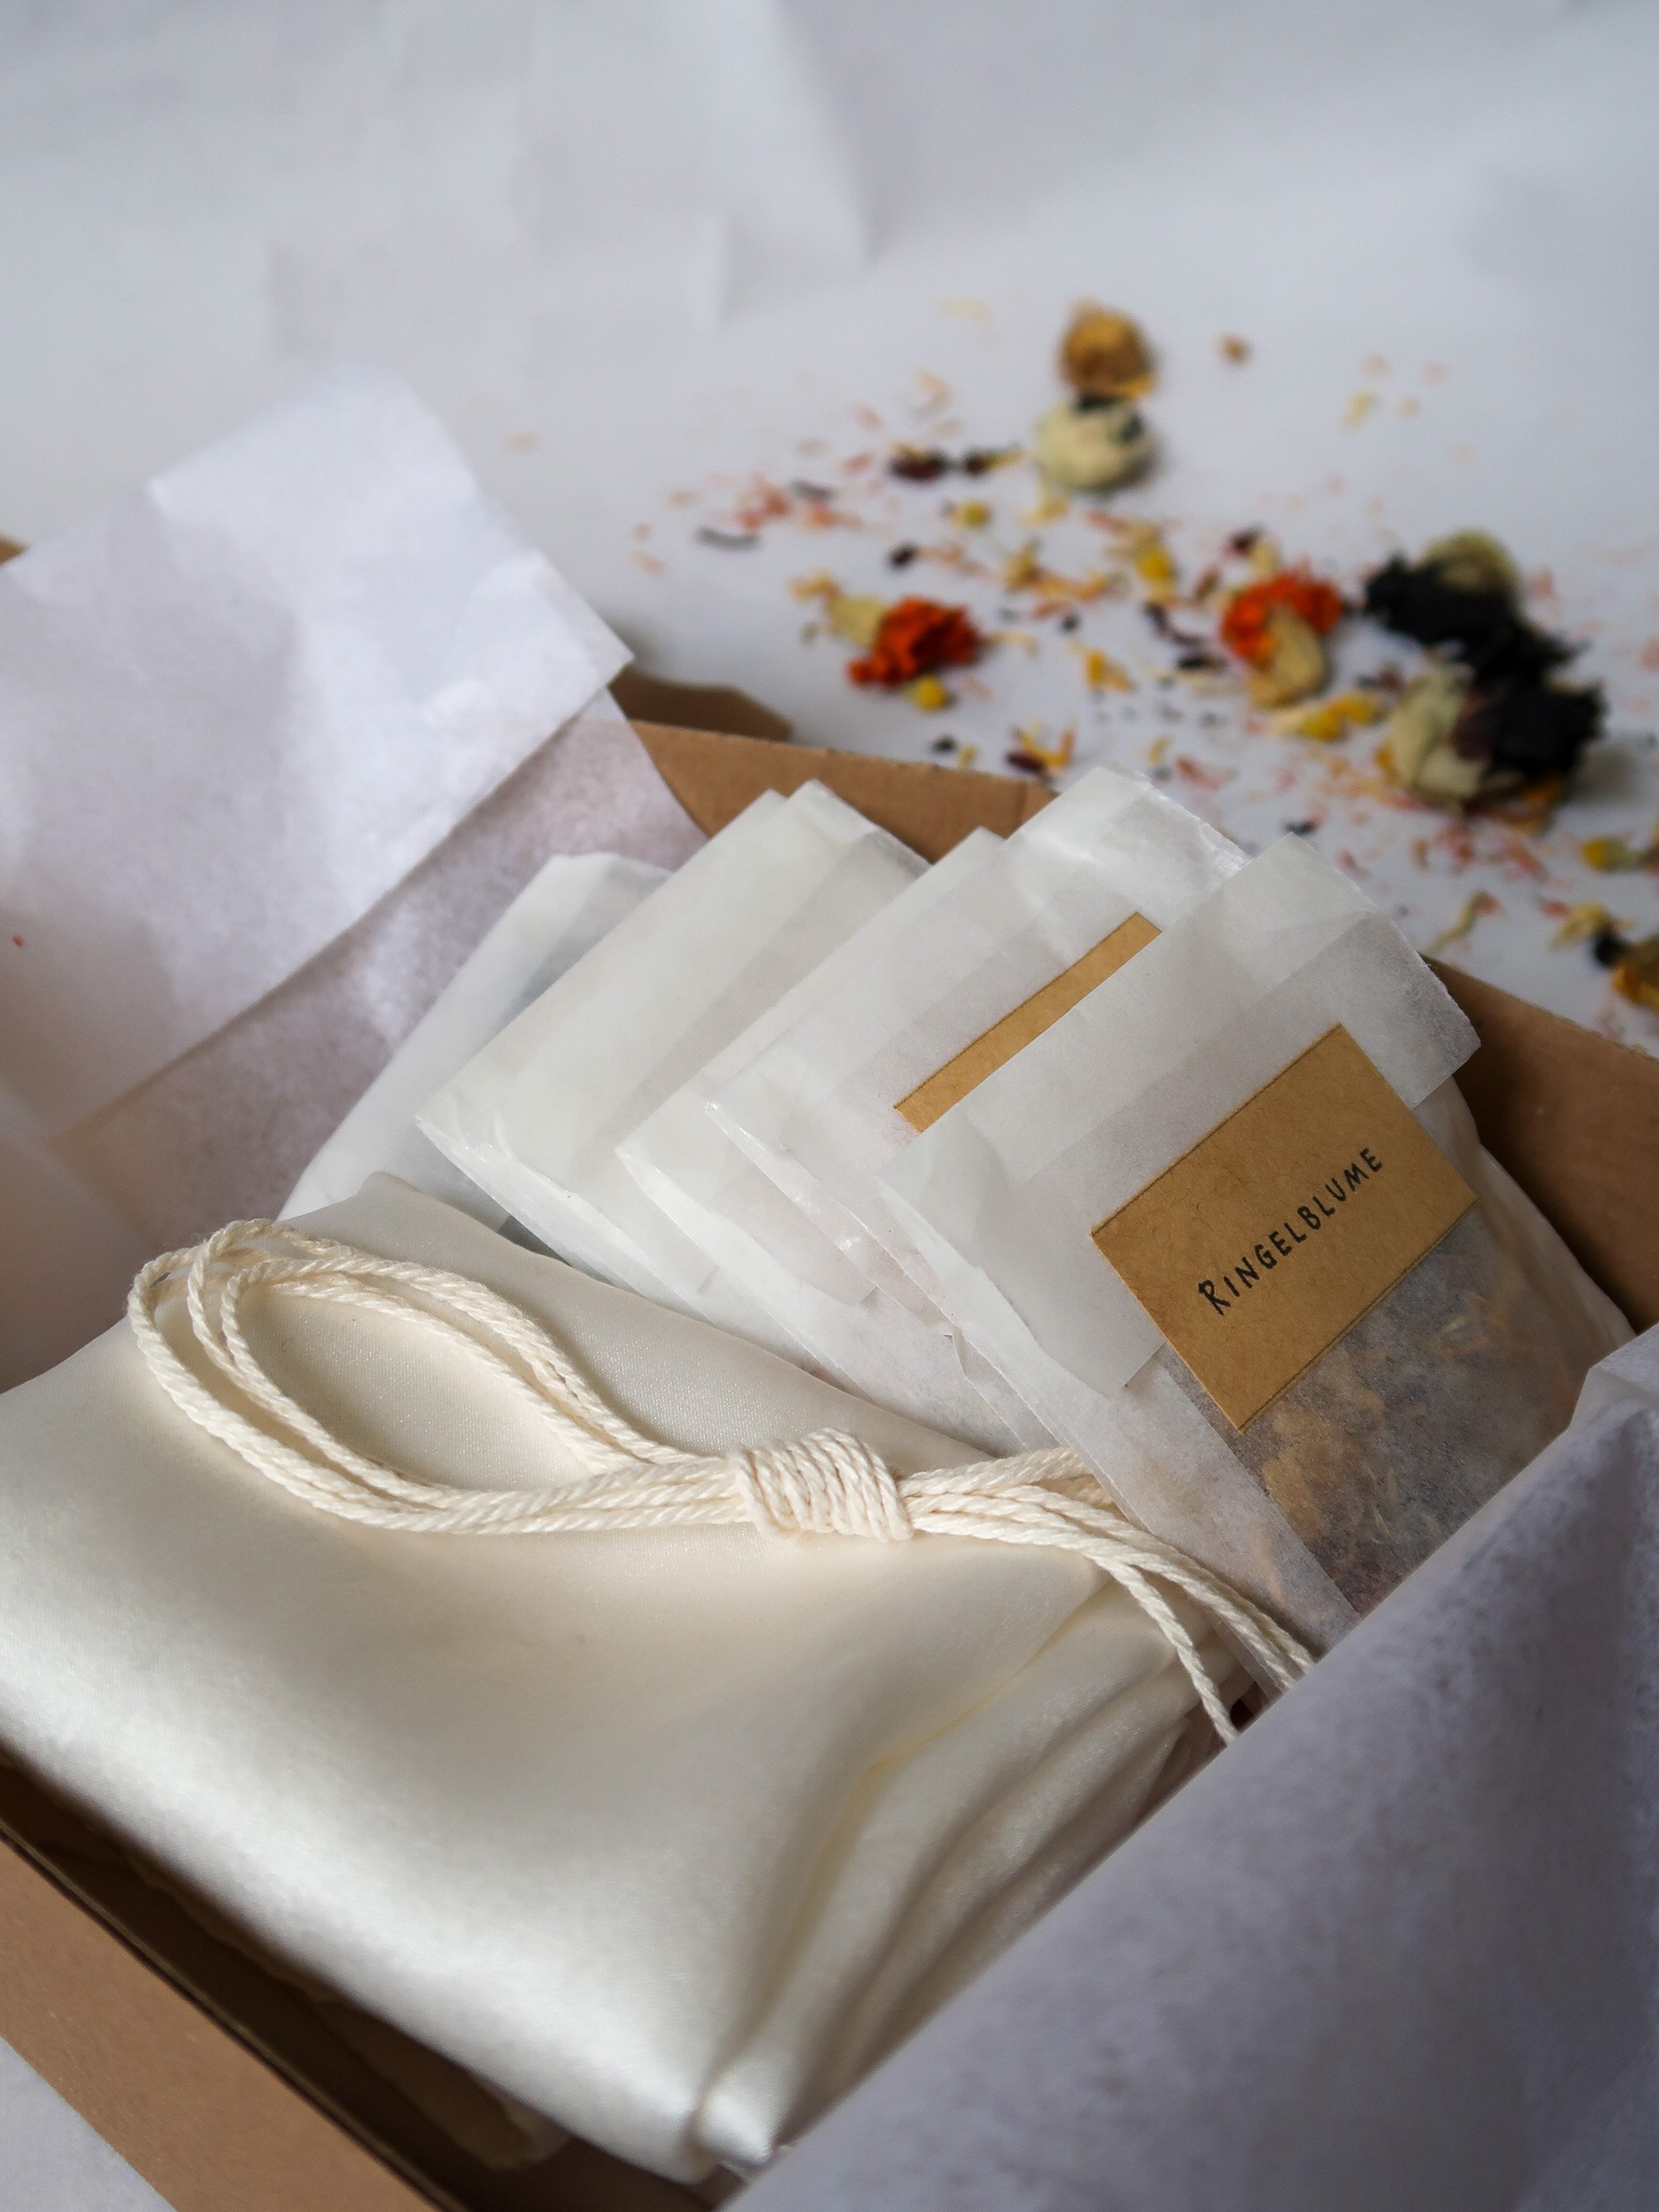
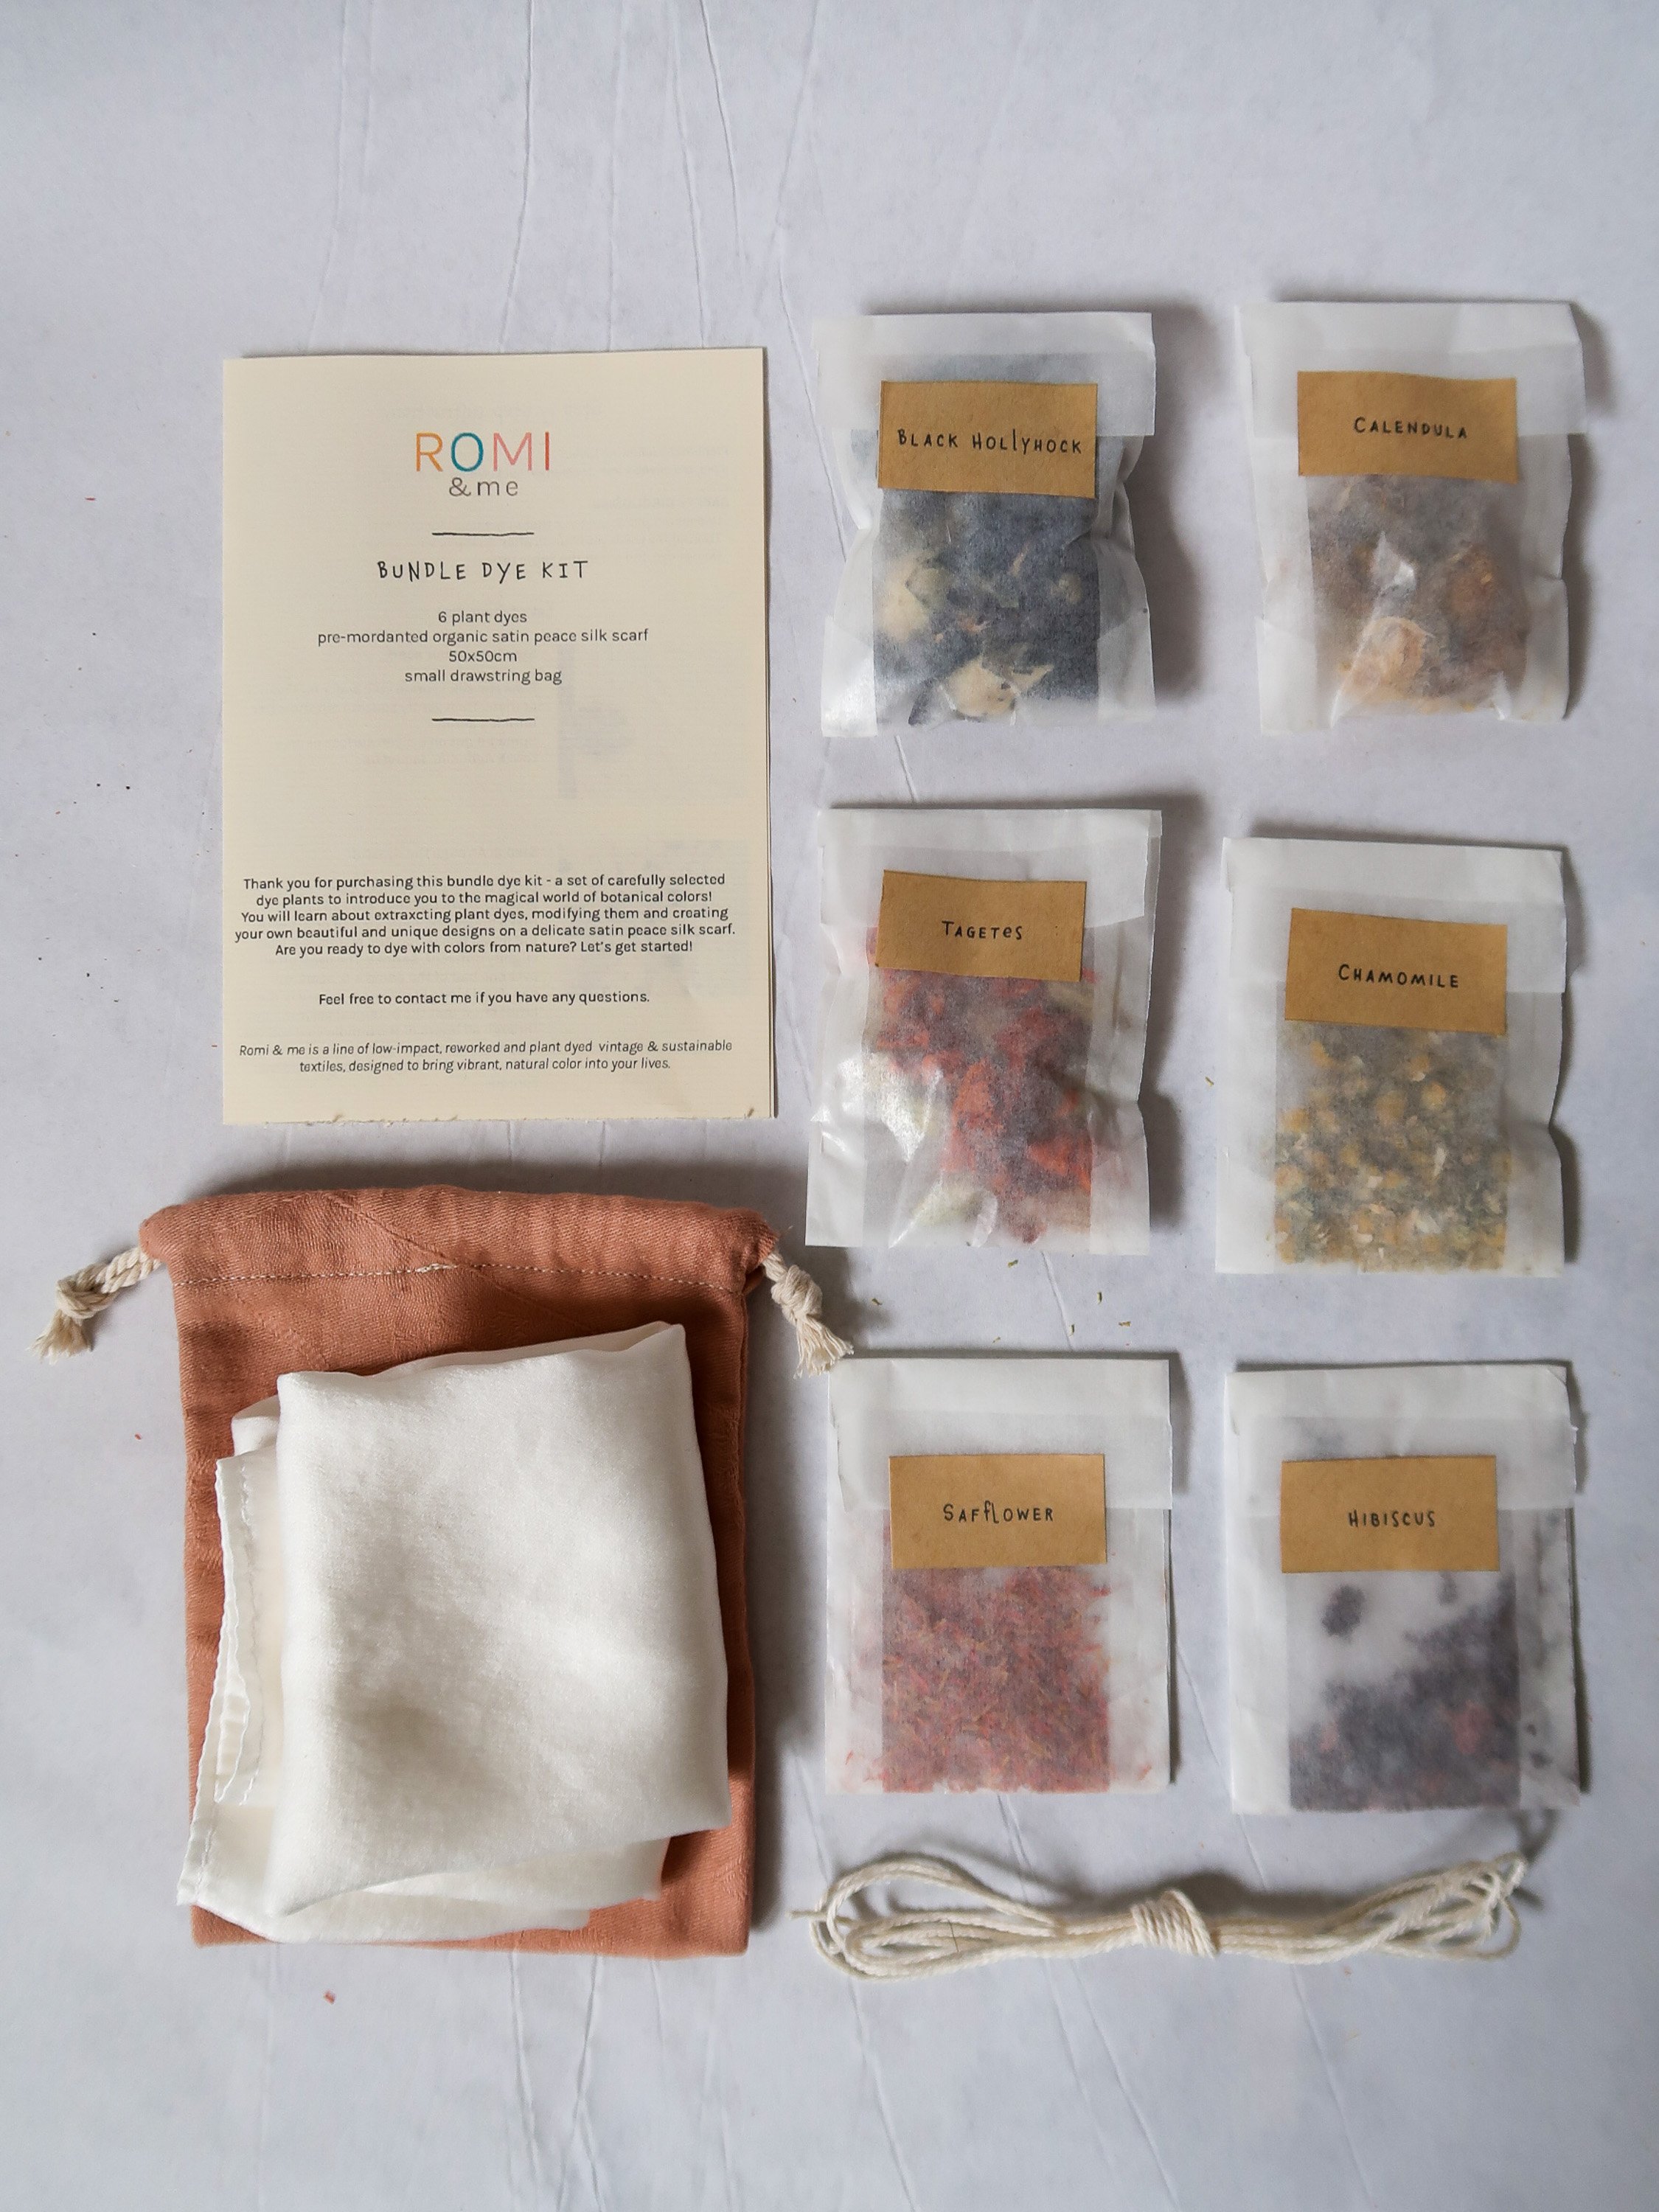
If you prefer to receive all the necessary ingredients as a kit, they are available for delivery here. The kit comes with six varieties of dry flowers, a piece of string, and two color modifiers. You can chose to dye a silk scarf, upcycled scrunchie or bandana.
Bundle dyeing stands out as one of the simplest dyeing techniques, resulting in a distinctive pattern with each attempt based on the arrangement of the dyestuff. This tutorial does not cover mordanting, the process of fixing color. Typically, this step is completed before the dyeing process using metal mordants. The dye pieces provided in the kit have undergone scouring (washing) and pre-mordanting with aluminum salts in my dye studio. If you are using materials from home, you can choose to skip this step, although it may result in less vibrant and less durable colors. However, don't let this keep you from experimenting! If you want to learn how to pre-treat your fabric for natural dyeing, I’ve got you covered in my guide “Natural dyeing with food waste”.
What you’ll need:
a variety of fresh or dried dye flowers / dye stuff (e.g. dyers chamomile, marigolds, black hollyhock, madder pieces, black beans, calendula, hibiscus, onion skins (incl. in the kit)
a piece of fabric, washed and preferably pre-mordanted (incl. in the kit). Silk works best, but you can use any kind of 100% natural fabric (like cotton, linen, hemp, ..)
Two pH modifiers: citric acid for low pH and baking soda for high pH (incl. in the kit). You can use lemon juice or white vinegar as a citric acid alternative, and washing soda instead of baking soda.
a piece of un-dyed string (incl. in the kit).
a pot, cheesecloth or steamer, a bowl for rinsing. (not included in the kit)

Step 1 Arranging the Bundle:
Lay out the fabric and arrange the chosen plant materials on one side. Consider creating patterns or designs by strategically placing the plants. Keep in mind that the pattern will slightly change, as the dyes print through all the layers of the fabric later.

Step 2 Fold
Fold the other half of the fabric over the plant material, creating a "sandwich."

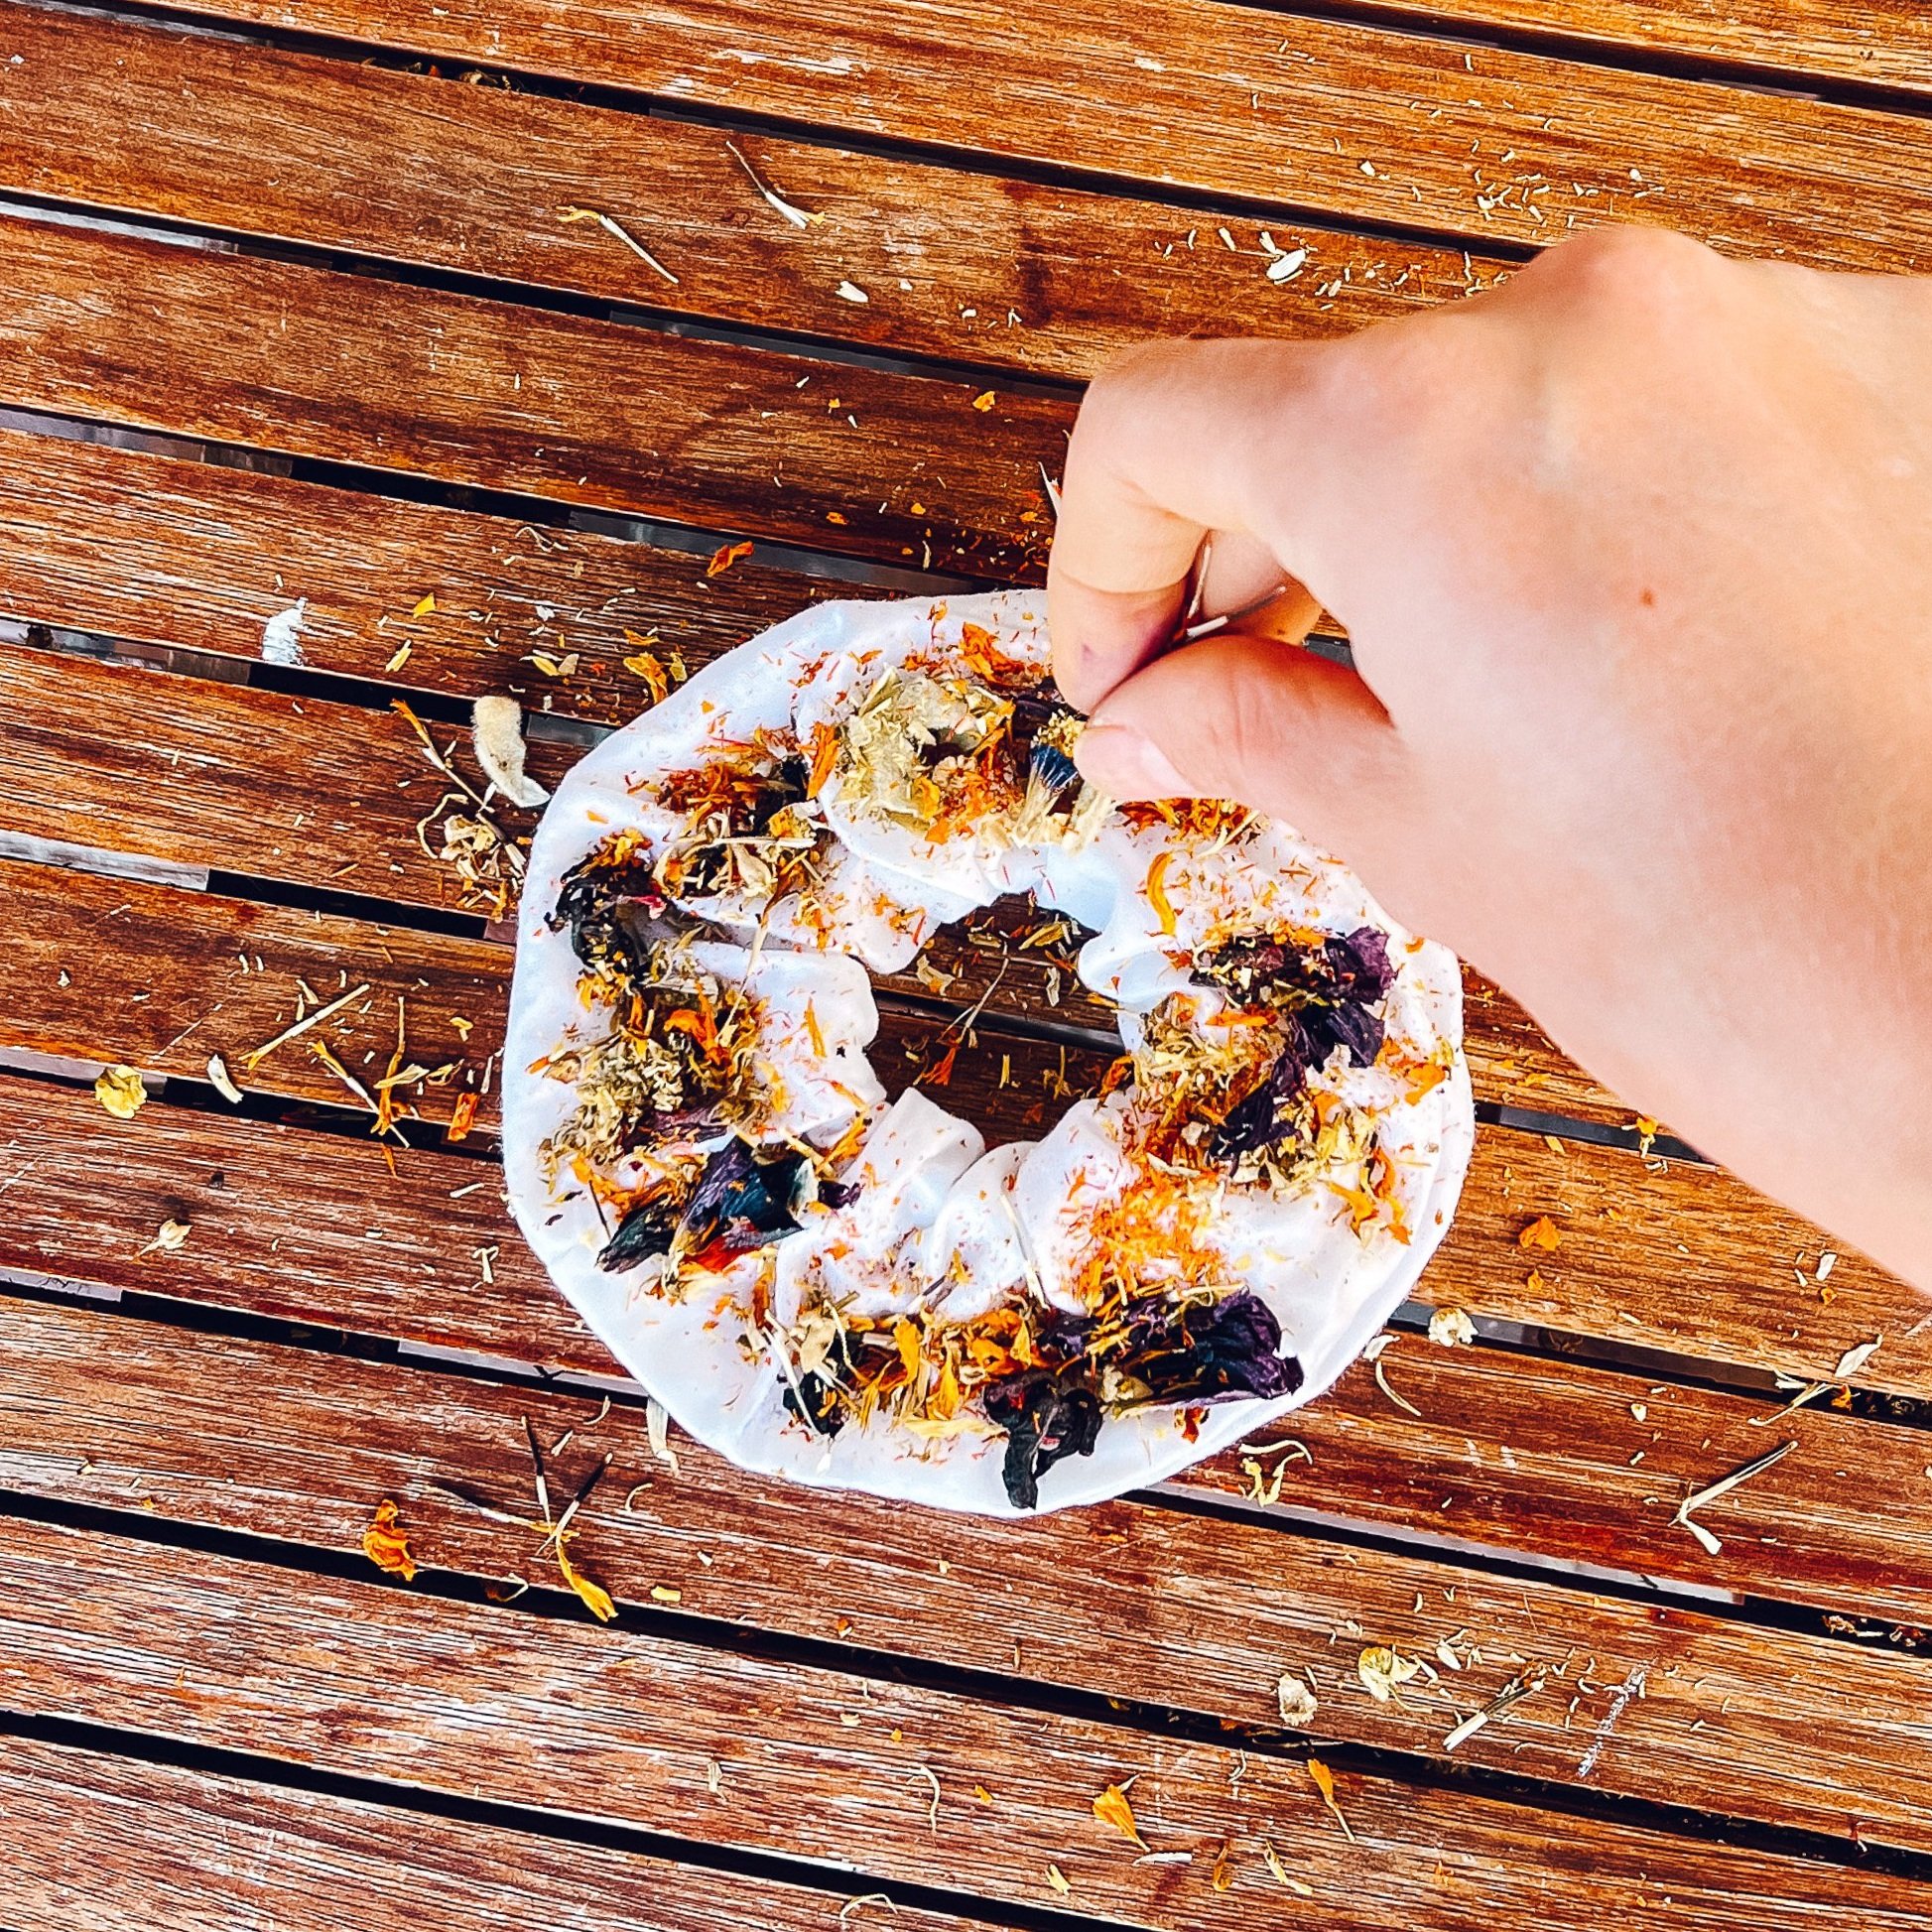
Step 3 Bundling and Tying:
Roll the fabric tightly, encapsulating the plant materials within. Secure the bundle with string or rubber bands, ensuring a snug fit to enhance dye transfer.

Step 4 Steaming
Steam the bundled fabric to activate the natural dyes present in the plants. This process allows the pigments to transfer from the plant material to the fabric, creating unique and unpredictable patterns. Steam between 25-30 minutes.

Step 4 Steaming
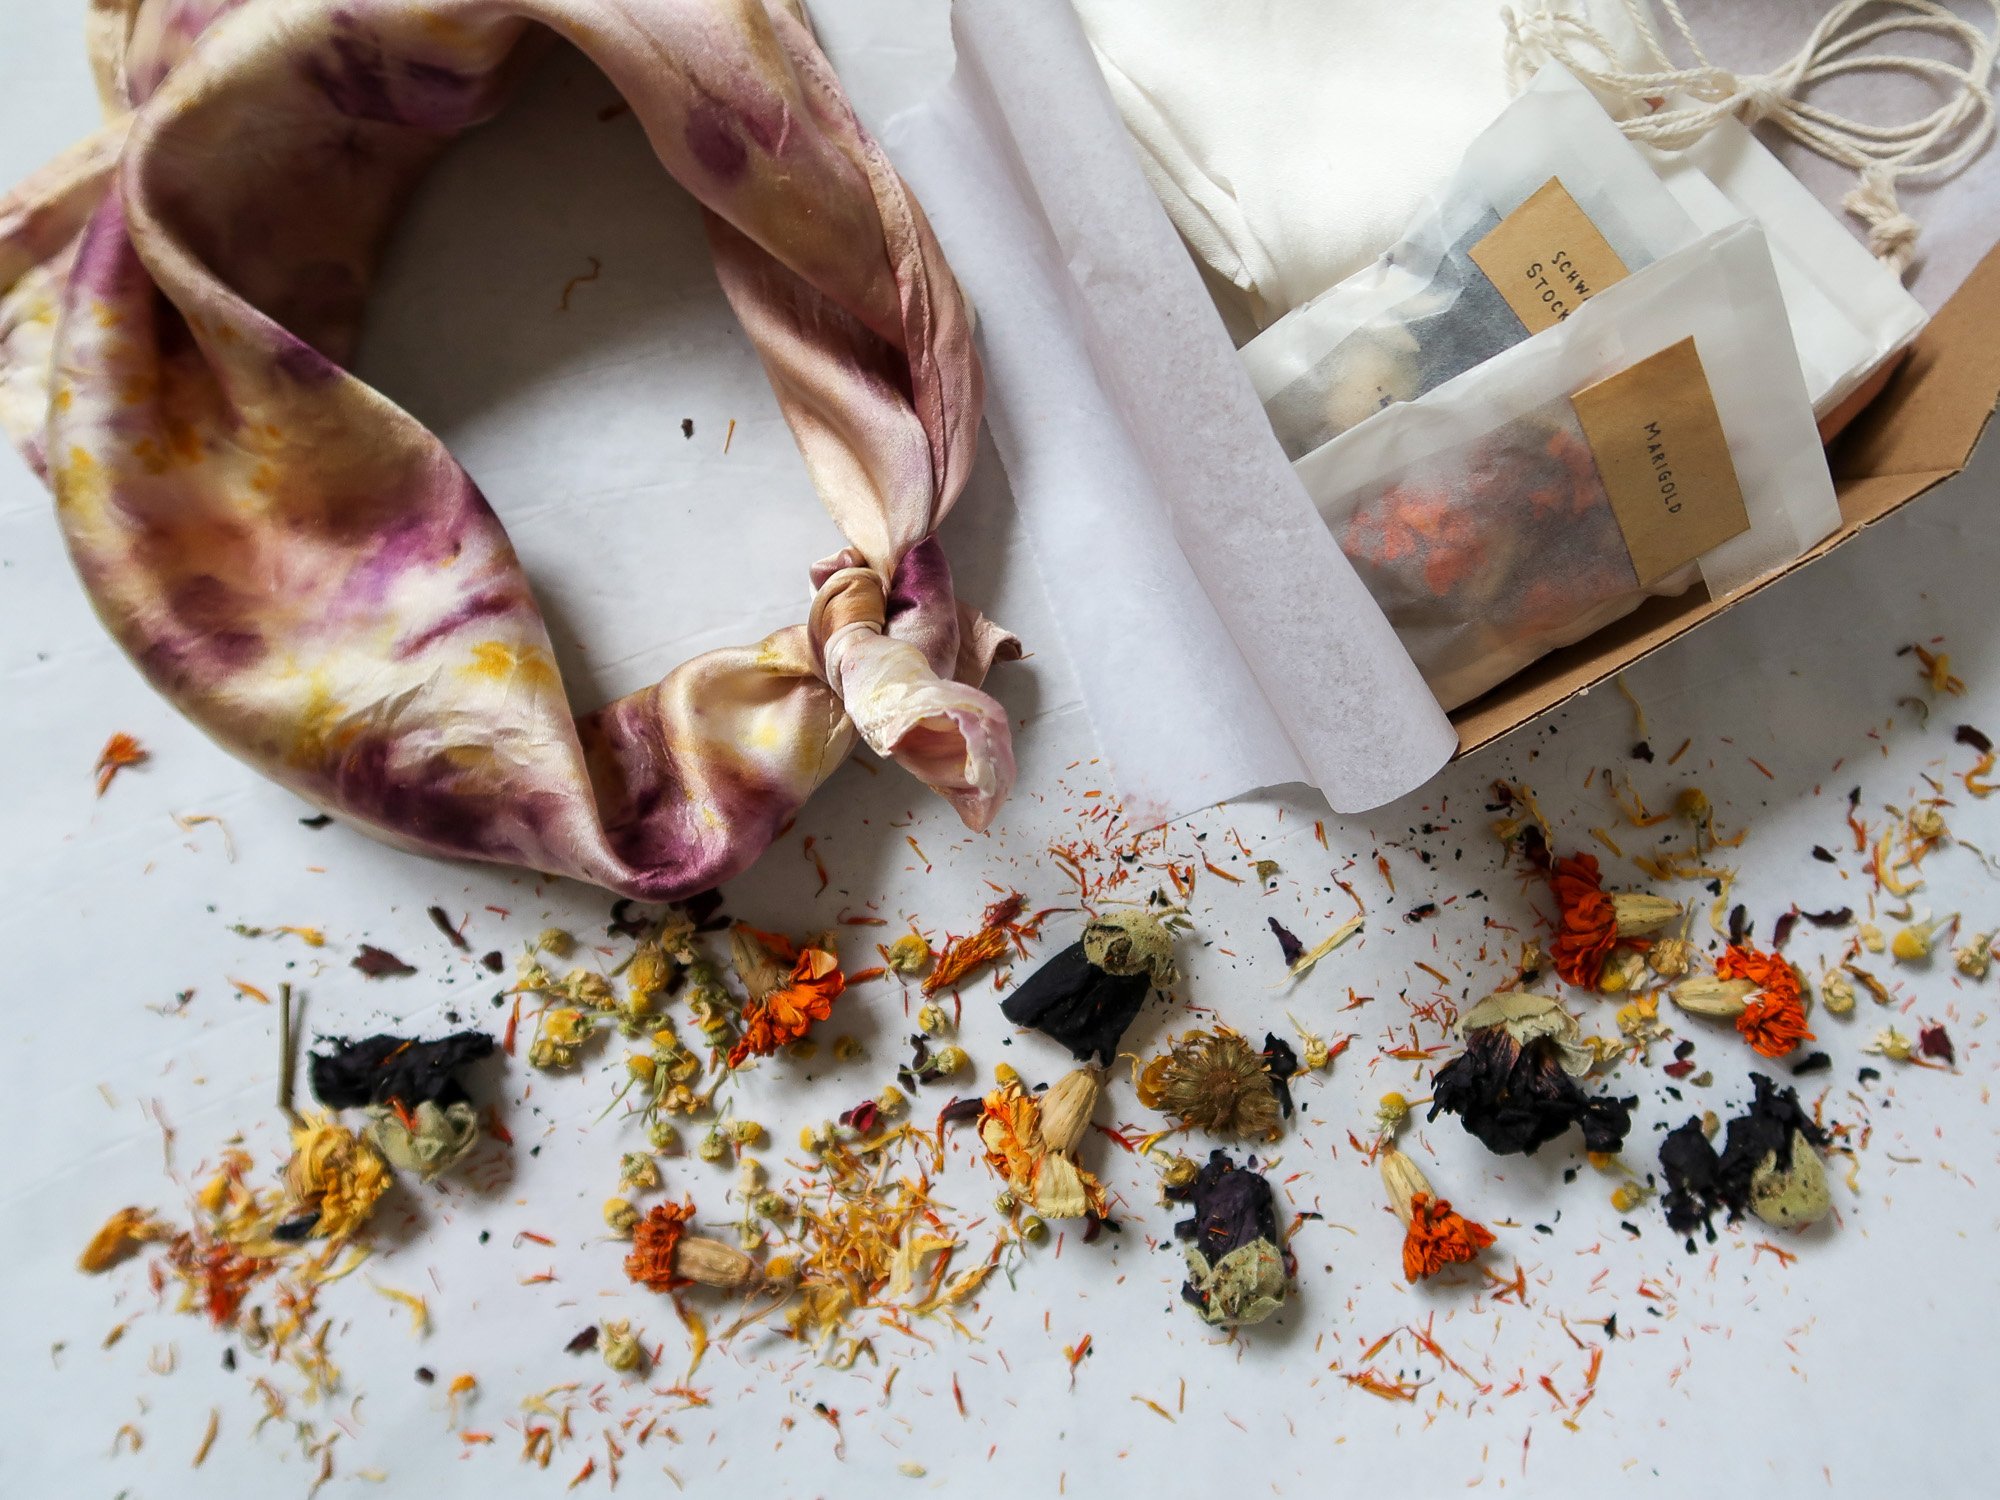
You’re bundle should look something like this after steaming.

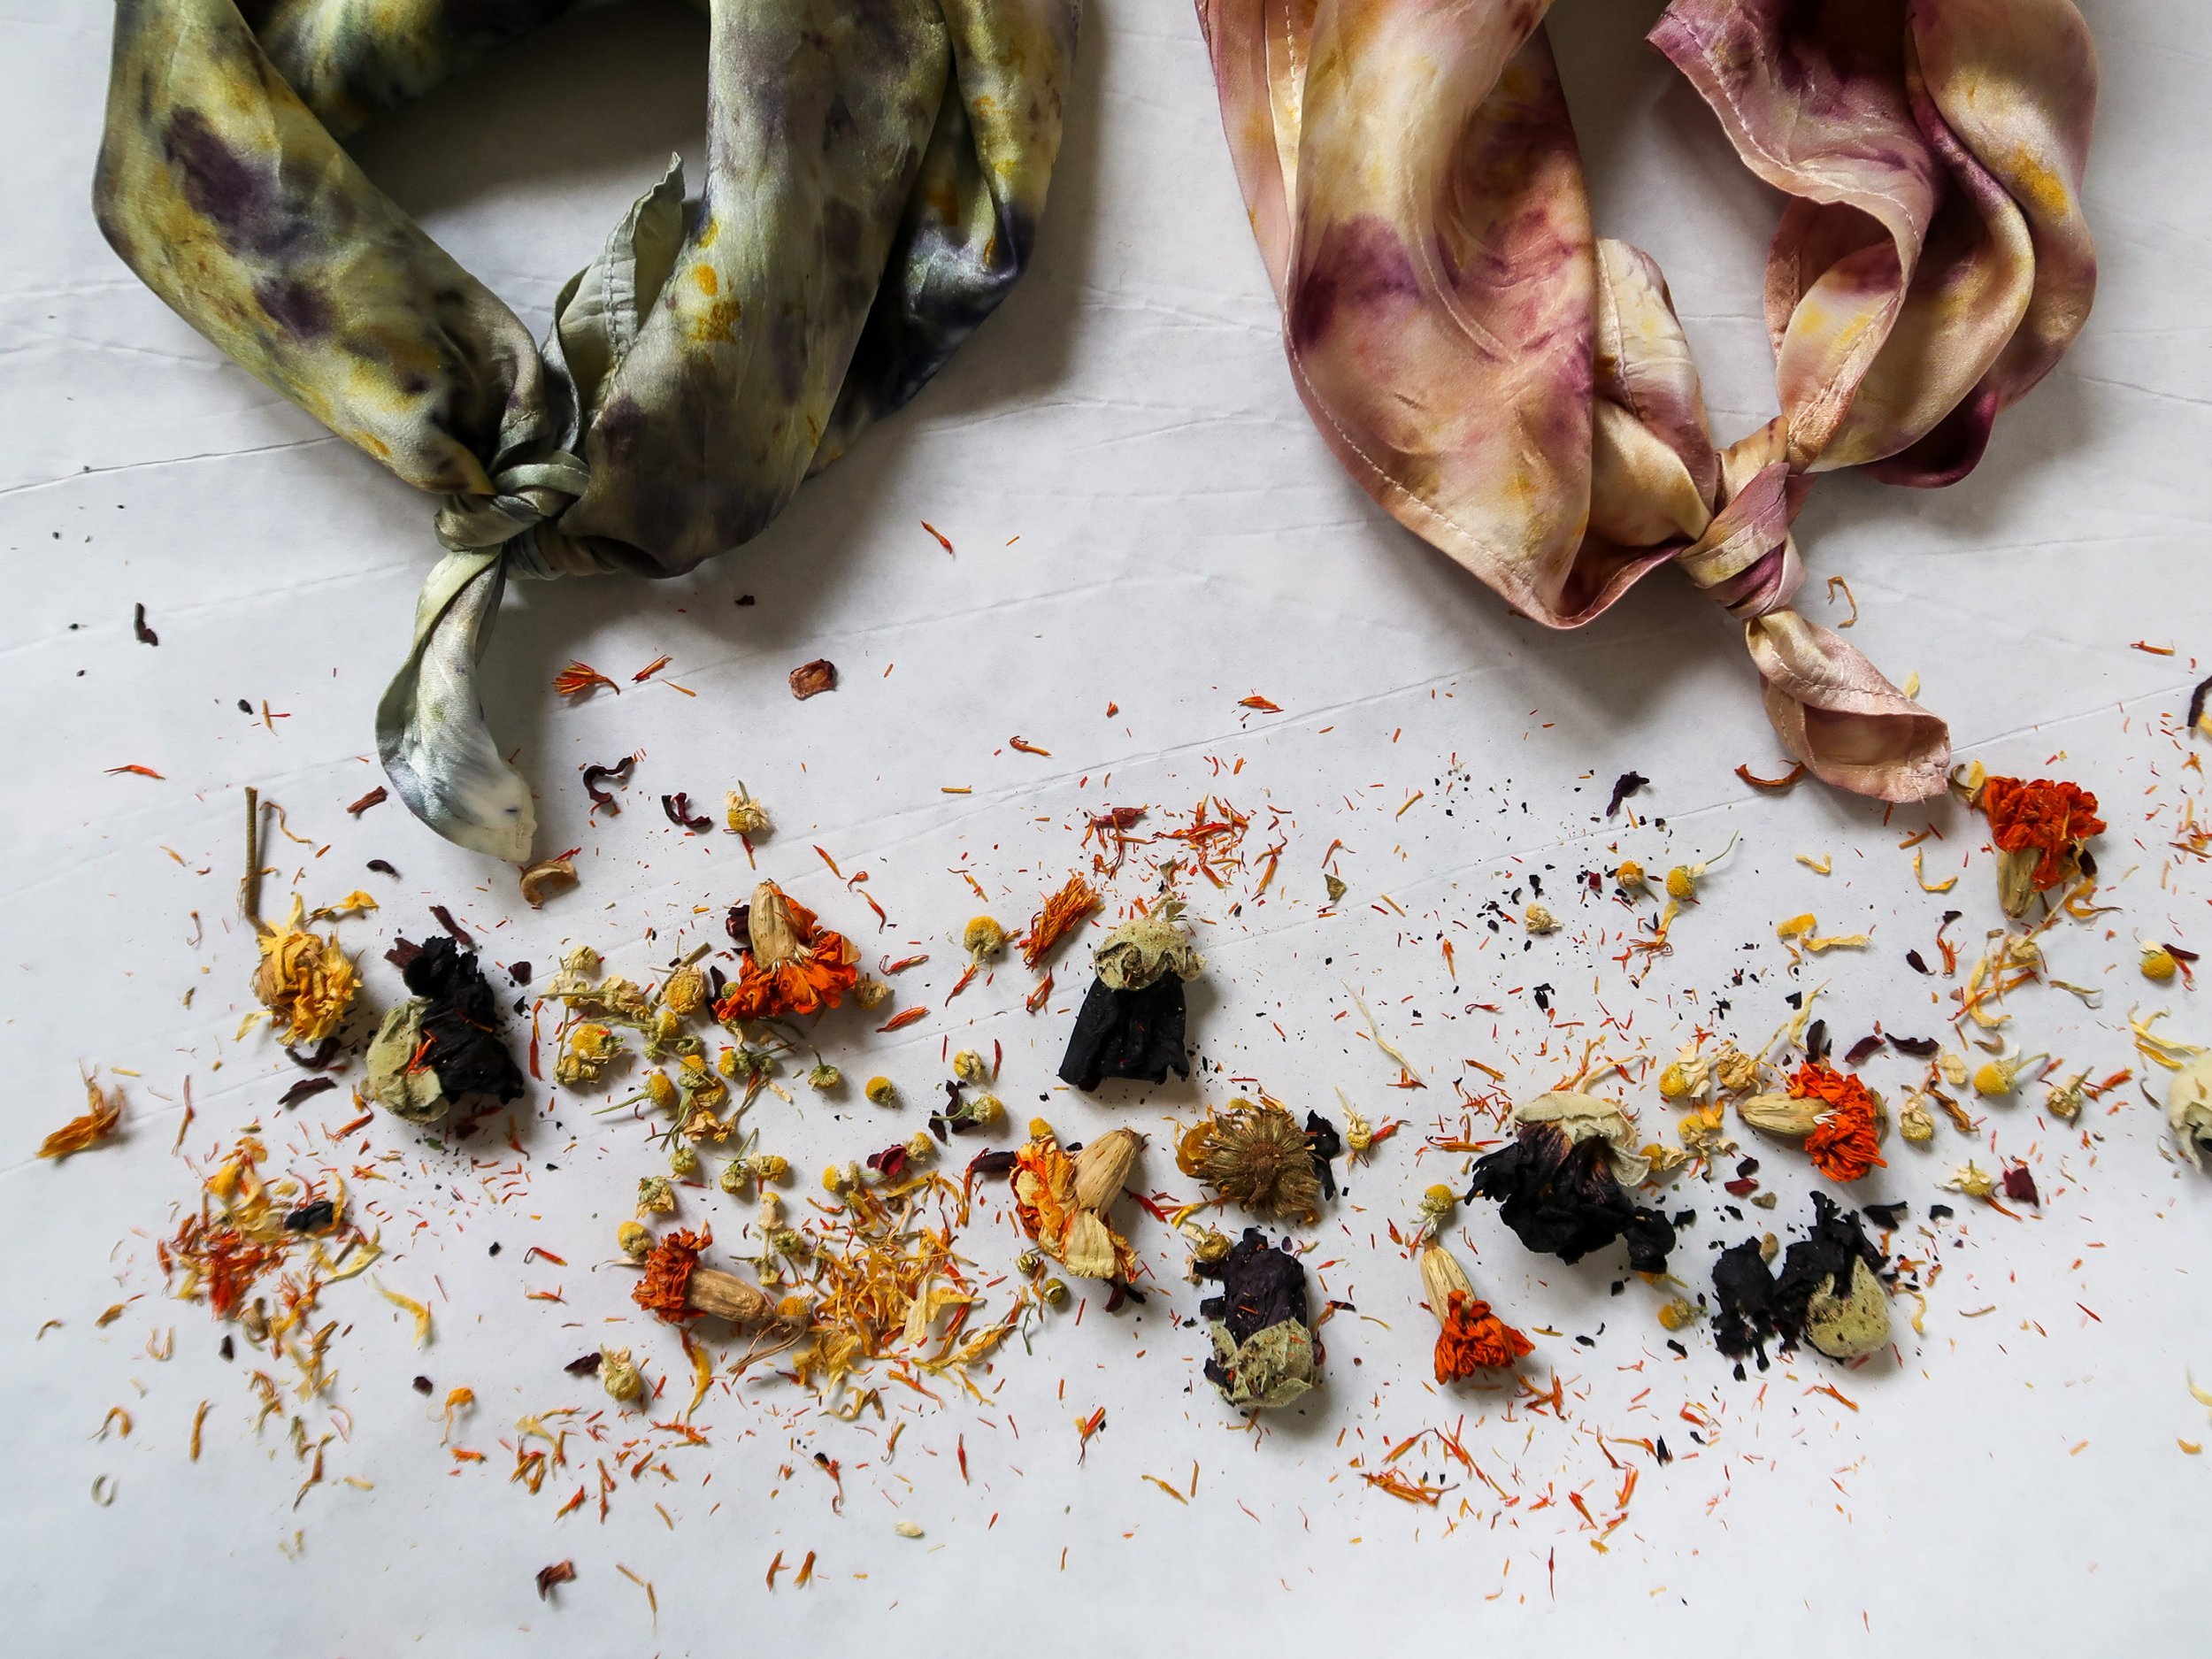
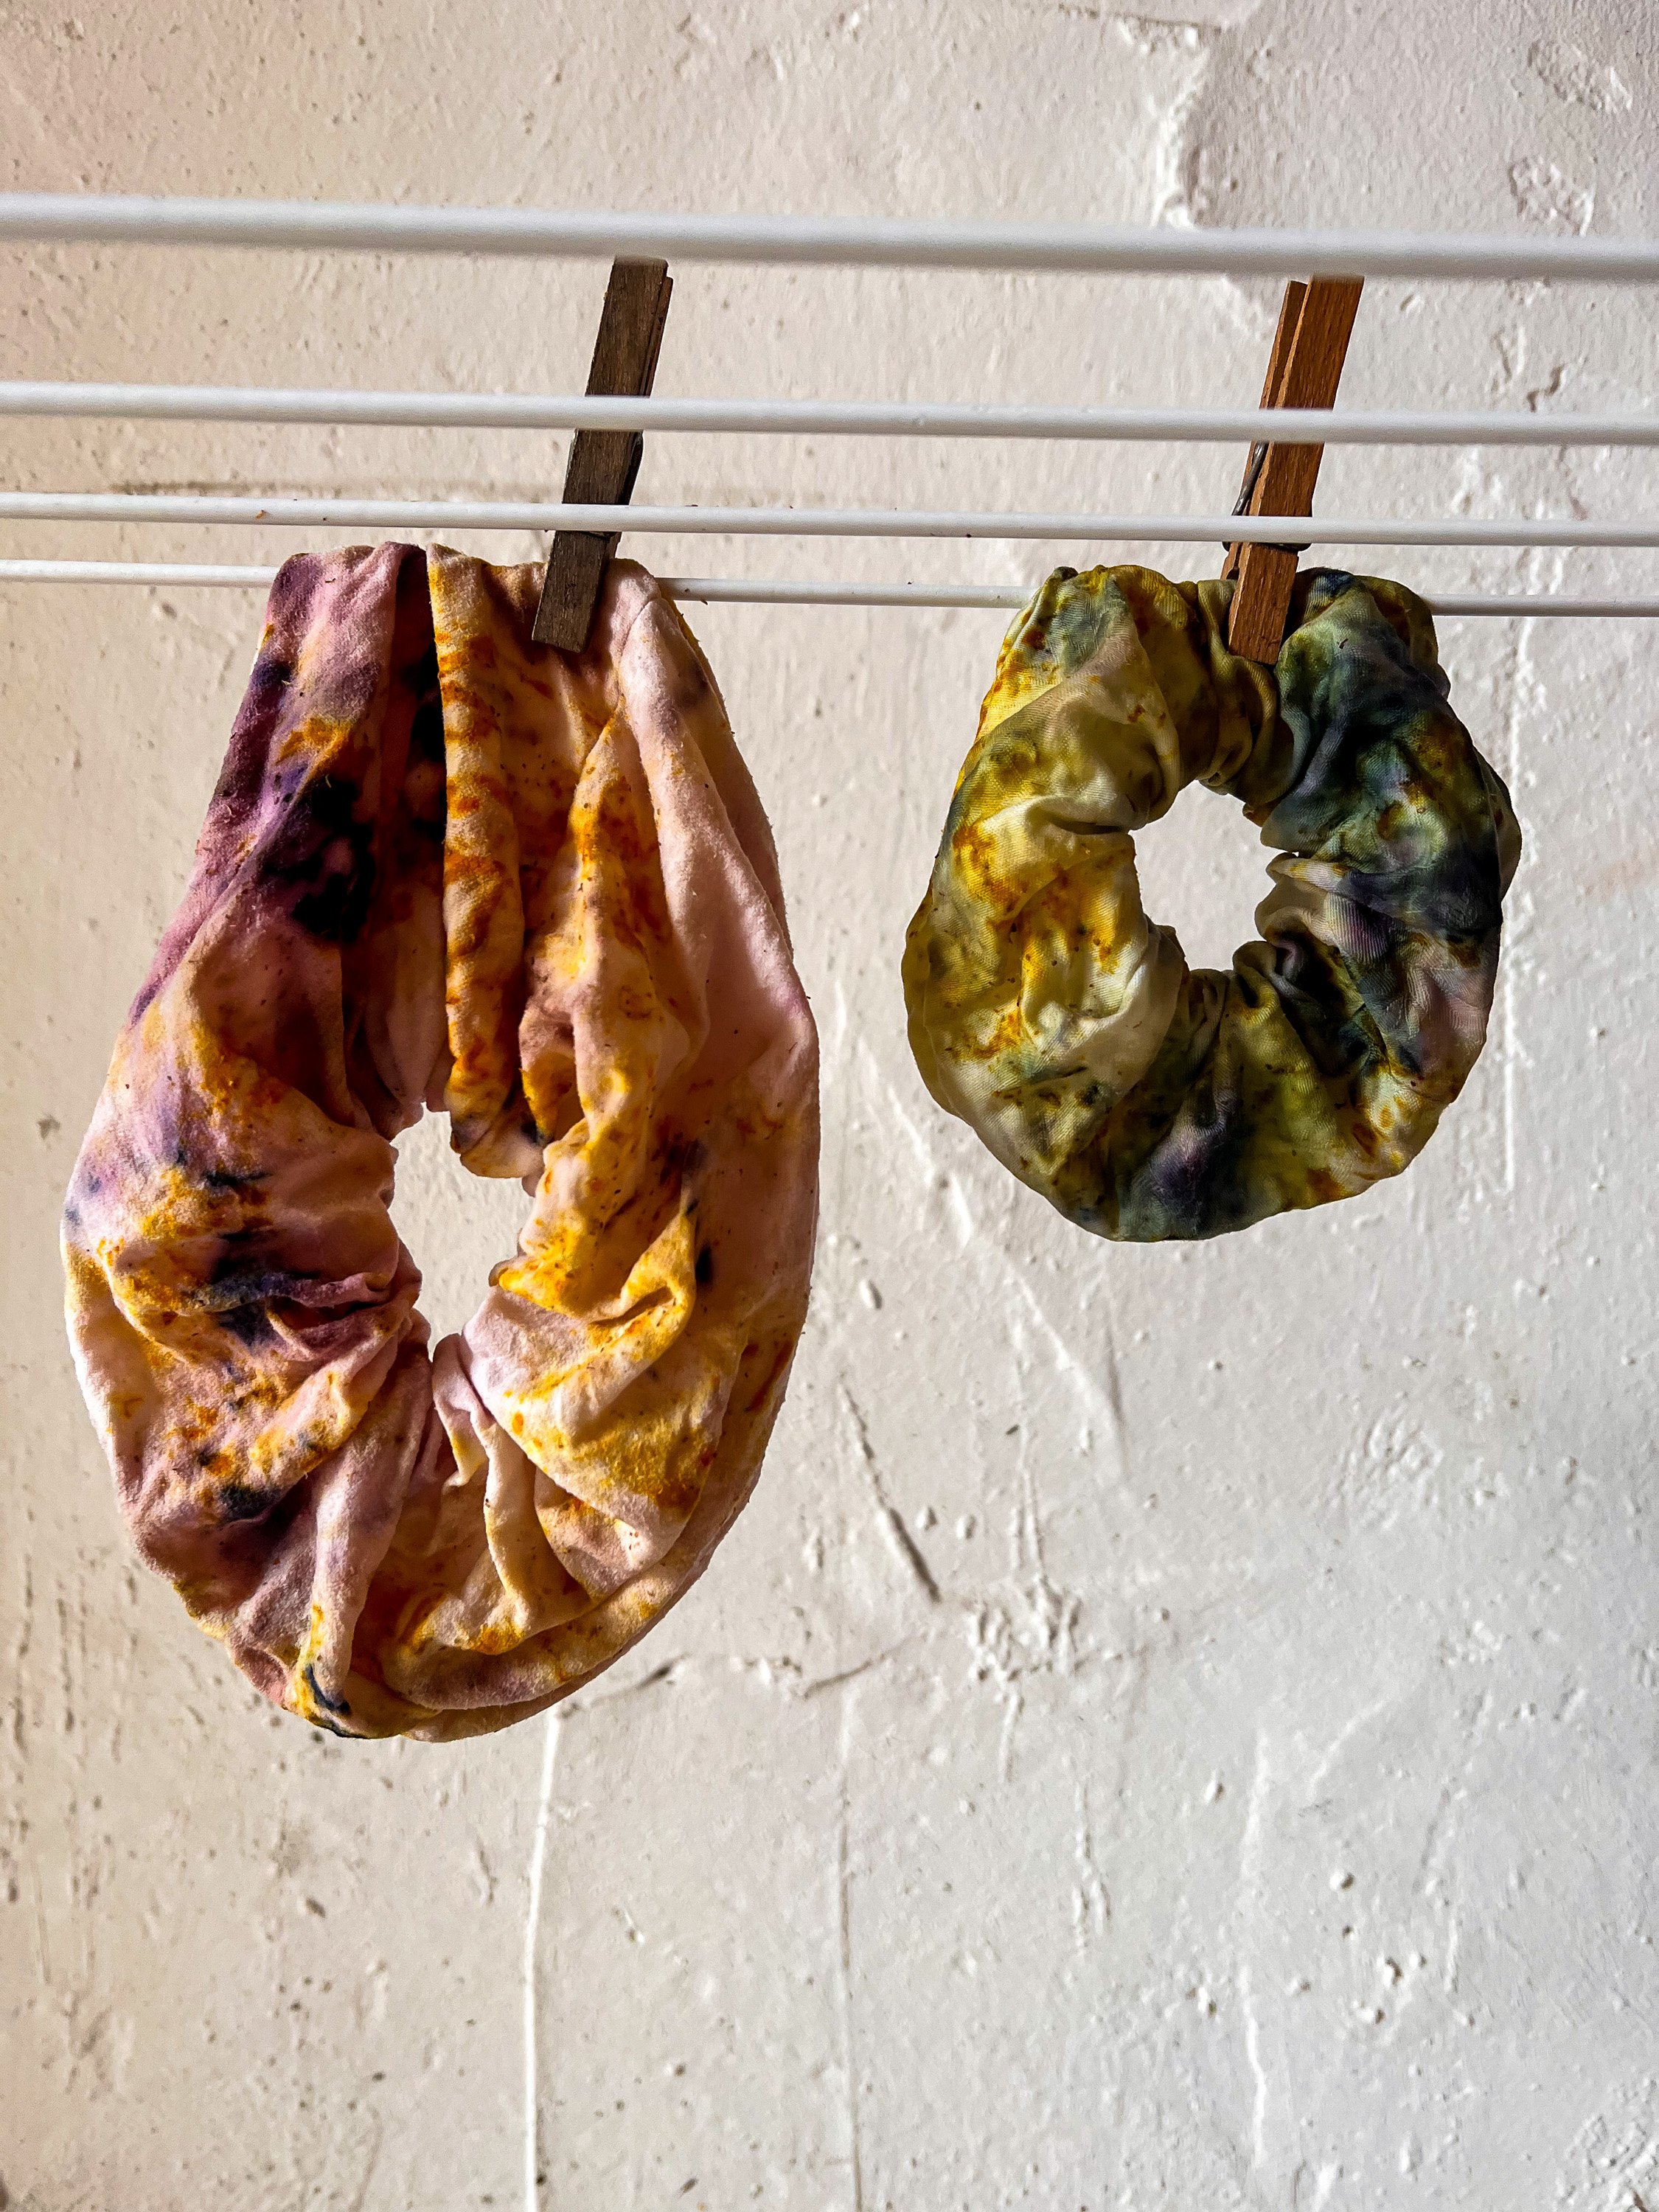
Step 5 Unwrapping and Revealing
After the steaming or boiling process, carefully unwrap the fabric bundle to reveal the vibrant and organic designs created by the natural dyes. The unpredictability of the process adds an element of surprise to each piece.

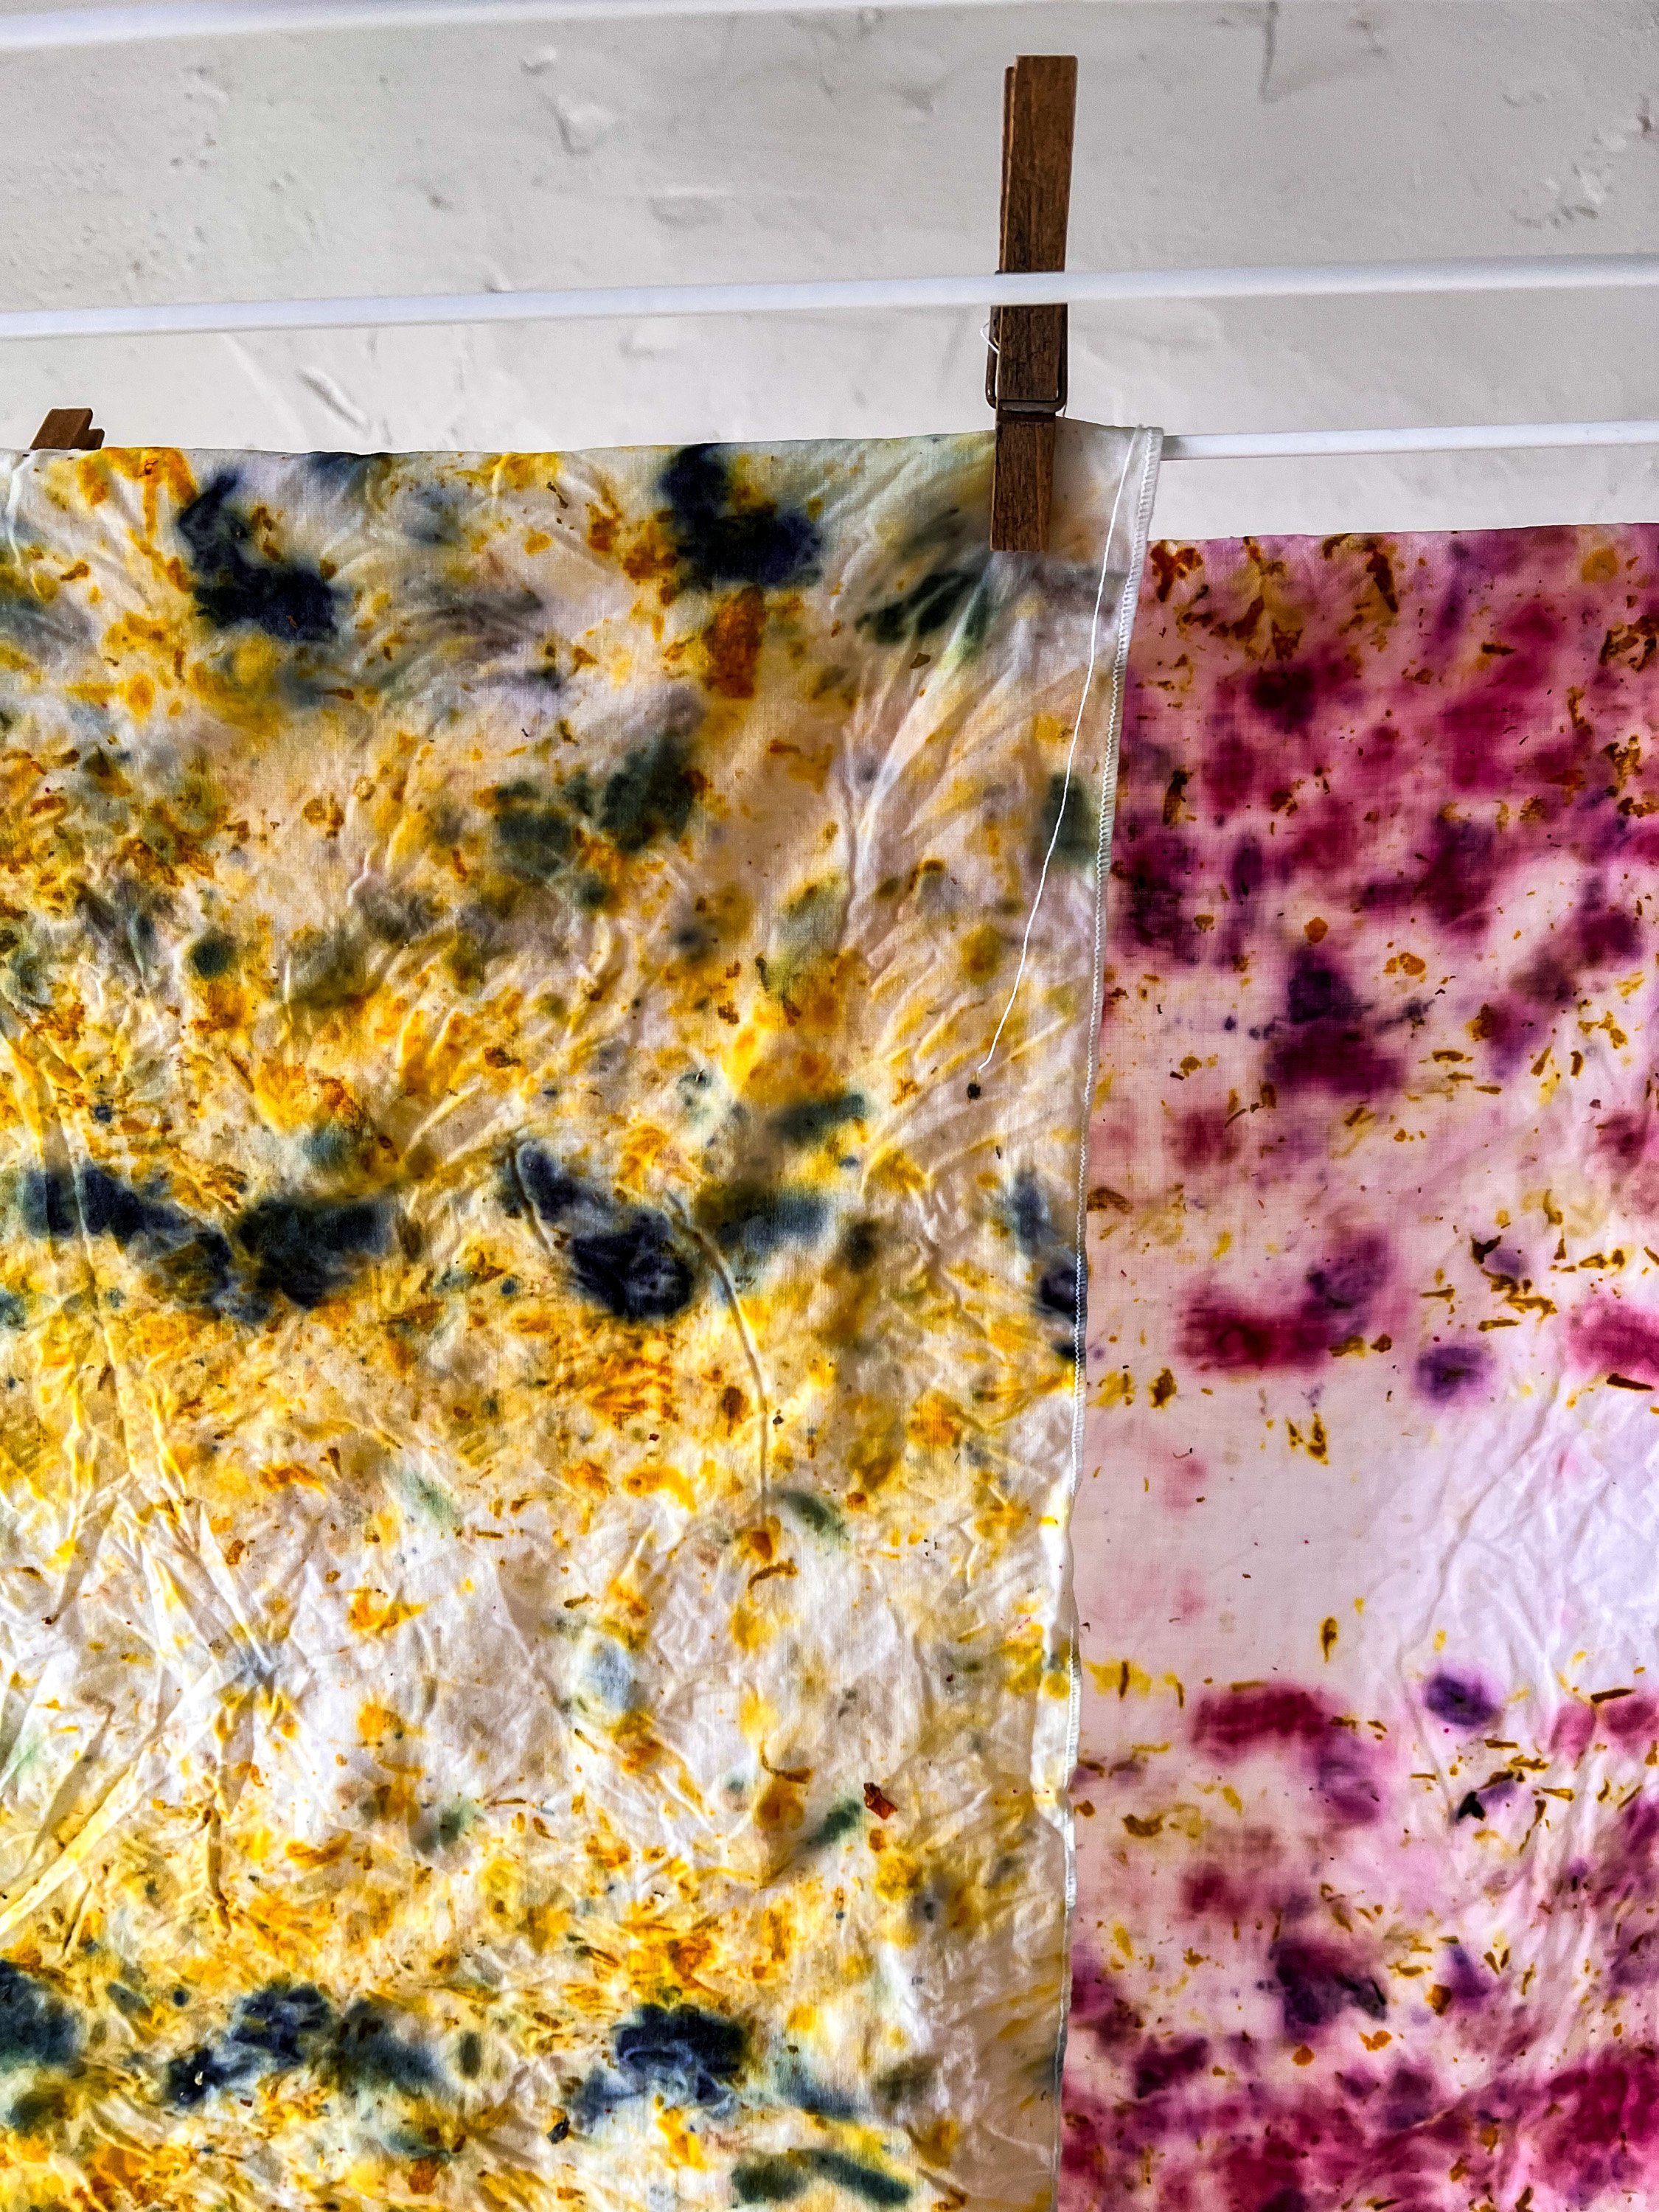
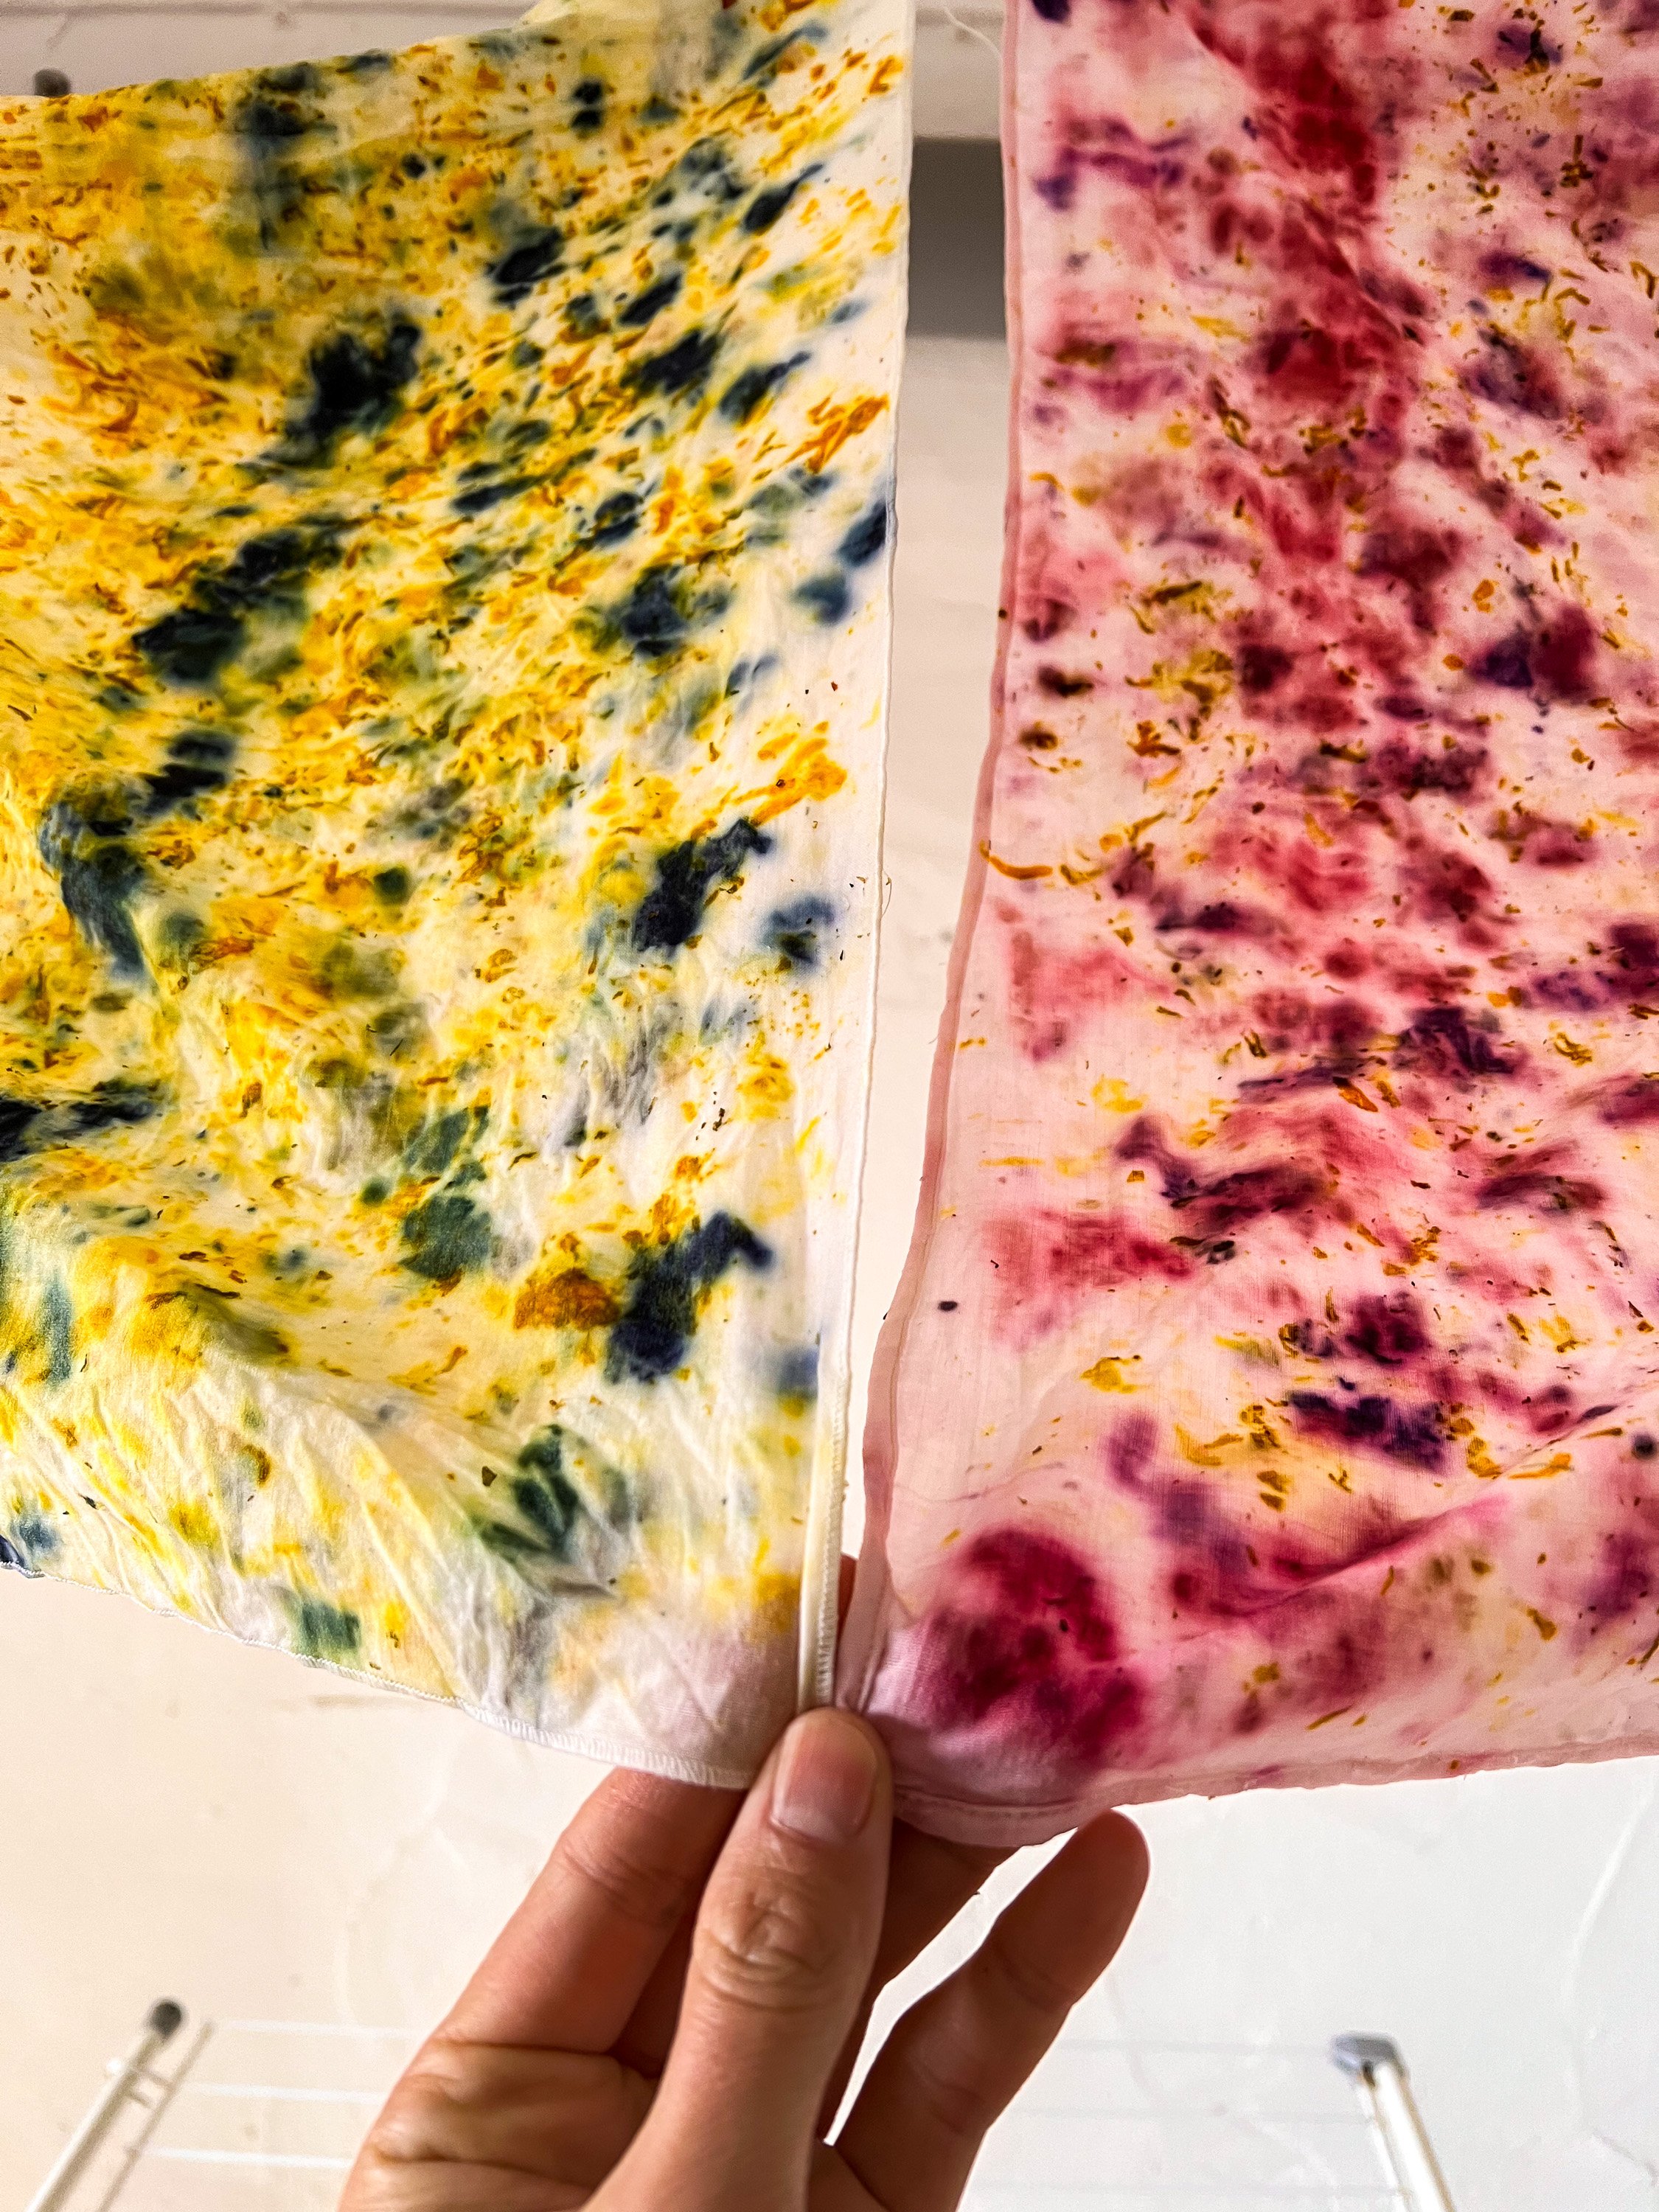
Step 6 Shift the color by changing the pH
Some of the plant dyes are pH-sensitive (e.g. Hibiscus, black beans, ..) which means that you can change the color of the fabric by changing the pH of the water. Simply dissolve some citric acid in some warm water for lighter colors (pink & purple) or some baking soda for darker colors (blue & green).
Don’t rinse your scarf after that! The natural pH of your tap water might change the color back again.

Step 7 Caring
Let the scarf air dry. Carefully remove any kind of leftover plant matter with your fingers. If you want to wash your scarf / scrunchie / bandana, hand wash in lukewarm or cold water using a neutral detergent (like silk or wool detergent). Make sure it’s the same pH as what you used for modifying, either by adding some citric acid/lemon juice/white vinegar OR baking soda/washing soda.
If you have any questions regarding this tutorial, the dye kit or anything else, please feel free to get in touch. Have so much fun trying out bundle dyeing and transforming fabric with natural color!
If you want to dive deeper, check out my Natural Dyeing with Food Waste - Ebook!
You can find it here:
NATURAL DYEING WITH FOOD WASTE
Food waste is what got me started with natural dyes, about 5 years ago. Wether it’s onion skins, avocado stones & skins, black beans or tea & coffee, the possibilities are endless when it comes to dyeing with food waste. You can easily get addicted to this, so be aware!